Table of Contents >> Show >> Hide
- Step 1: Gather the Necessary Tools and Materials
- Step 2: Preparing the Garage Door
- Step 3: Installing the Header Bracket
- Step 4: Assembling the Rail System
- Step 5: Installing the Opener Motor
- Step 6: Connecting the Rail and Motor
- Step 7: Wiring the Garage Door Opener
- Step 8: Installing the Safety Sensors
- Step 9: Testing the Garage Door Opener
- Step 10: Final Adjustments and Safety Checks
- Conclusion
- My Experience with Installing a Garage Door Opener
Installing a garage door opener can seem like a daunting task, but with a little patience and the right tools, you can easily tackle this home improvement project. A garage door opener adds convenience and security, but knowing how to install one yourself not only saves you money but also gives you the satisfaction of completing a task on your own. Whether you’ve just moved into a new home, or your current opener needs replacing, this guide will walk you through the entire process from start to finish. So, roll up your sleeves, grab your toolkit, and let’s dive into how to install a garage door opener yourself!
Step 1: Gather the Necessary Tools and Materials
Before you begin, it’s important to gather all the necessary tools and materials. Here’s what you’ll need:
- Garage door opener kit (including motor, rail, chain/belt, and hardware)
- Step ladder
- Wrench set
- Drill and drill bits
- Measuring tape
- Socket wrench
- Pencil and level
- Safety glasses and gloves
It’s essential to ensure that you have all the parts from your opener kit. Most kits come with the opener motor, a rail system, a chain or belt (depending on the model), and all mounting hardware. Take a moment to familiarize yourself with the instruction manual, as each model may have specific installation instructions.
Step 2: Preparing the Garage Door
Before installing the opener, you need to prepare the garage door itself. Make sure the door is in good working condition. If there are any issues with the door’s balance or the tracks, address them first, as the opener will not function properly if the door is off-track or unbalanced. Here are a few quick checks to make:
- Manually lift the door halfway to ensure it stays in place. If it doesn’t, the springs may need adjusting.
- Check the tracks for any debris or obstructions.
- Ensure the rollers are in good condition and move smoothly.
Step 3: Installing the Header Bracket
The first physical step in the installation is mounting the header bracket. This bracket supports the garage door opener’s rail system and connects to the top of the door frame. Using your measuring tape, determine the correct height for the header bracket, which is usually around 2 to 3 inches above the door. Mark the spot with a pencil, then drill pilot holes into the frame. Use the hardware provided to mount the bracket securely to the wall. A level will help ensure the bracket is straight, preventing any misalignment issues down the road.
Step 4: Assembling the Rail System
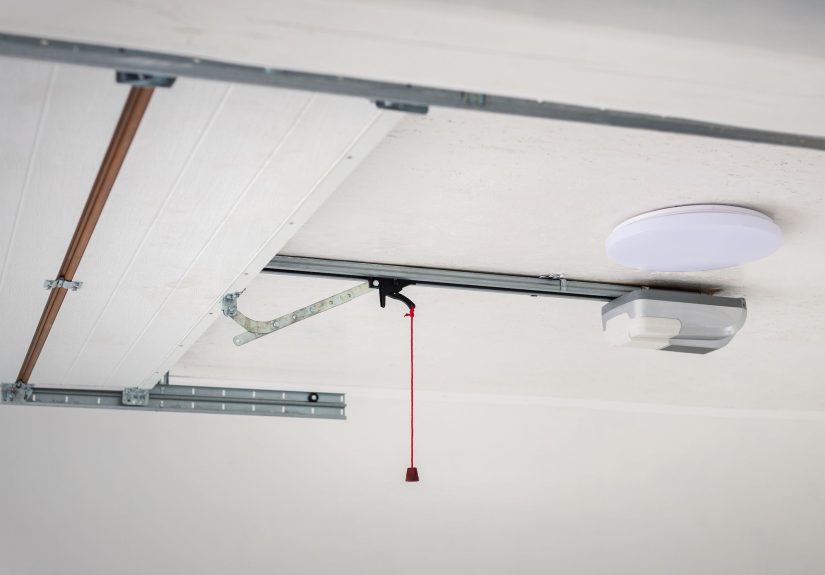
Next, you will need to assemble the rail system that connects the opener motor to the door. Most kits include a rail system that comes in several pieces that must be connected. Follow the instructions to assemble these parts, and be sure to securely attach them to the motor unit as indicated. The chain or belt that moves the door will need to be attached to this rail. Make sure the chain or belt is properly tensioned to avoid issues during operation. Attach the rail system to the header bracket you installed earlier, ensuring that the opener is mounted properly and level.
Step 5: Installing the Opener Motor
With the rail system in place, it’s time to install the opener motor itself. Position the motor directly above the garage door frame, making sure the motor is centered with the rail. Using your step ladder, lift the motor into place and attach it to the ceiling using the mounting brackets provided. It’s essential to make sure the motor is secure, as a loose opener can cause operational problems. Make sure the motor’s power cord is free from any obstacles and can reach the nearest outlet.
Step 6: Connecting the Rail and Motor
With the motor mounted, connect the rail system to the motor. Most garage door opener kits include a coupling mechanism that will connect the rail to the motor. Tighten the bolts securely to ensure everything is in place. Once connected, test the movement of the rail and motor to make sure everything moves smoothly. If you have a chain drive system, check that the chain is correctly aligned and the tension is consistent.
Step 7: Wiring the Garage Door Opener
Now it’s time to wire the opener. This is where you’ll need to be cautious and follow the electrical wiring instructions carefully. You’ll need to connect the opener to the power supply, usually by plugging it into a nearby outlet or hardwiring it into the electrical system, depending on your setup. Ensure that all connections are secure and well-insulated to avoid any safety hazards.
Step 8: Installing the Safety Sensors
Most modern garage door openers come with safety sensors that detect obstacles in the path of the door. These sensors are mounted on either side of the door, typically a few inches off the floor. Follow the instructions to attach the sensors and connect them to the motor unit. Once they are in place, check the alignment of the sensors using a level. A misaligned sensor will prevent the door from operating properly.
Step 9: Testing the Garage Door Opener
With everything installed, it’s time to test the opener. Start by checking the door’s movement. Use the remote control or wall-mounted switch to open and close the door several times, observing whether the door moves smoothly and evenly. Ensure that the door stops when it reaches the fully open and fully closed positions. If the opener includes any additional settings, like force adjustment or travel limits, fine-tune them until the door operates as desired.
Step 10: Final Adjustments and Safety Checks
Lastly, conduct a thorough safety check. Test the reversing feature of the door by placing a small object in its path (like a roll of paper towels) and observing whether the door reverses as it should. If it doesn’t, adjust the force settings or recheck the sensor alignment. Ensure the opener operates smoothly with minimal noise or vibration. If everything looks good, your garage door opener is ready to go!
Conclusion
Installing a garage door opener yourself is a manageable project with the right tools, a bit of patience, and careful attention to detail. While this guide covers the basics of installation, always follow the specific instructions provided by the manufacturer for your opener model. With a little effort, you’ll be able to enjoy the convenience and security of an automatic garage door opener without the cost of professional installation.
My Experience with Installing a Garage Door Opener
When I first attempted to install a garage door opener, I was intimidated by the complexity of the task. I watched a few videos and read through the manual thoroughly. The hardest part was dealing with the rail system and ensuring it was level, which took a bit of trial and error. However, after getting the motor installed and wired correctly, I felt a huge sense of accomplishment when the door started moving smoothly. One of the things I learned is that it’s essential to double-check the sensor alignment, as this step can prevent a lot of potential problems. The entire process took about four hours, but I saved hundreds of dollars compared to hiring a professional.
Another tip I learned from experience is not to rush through the wiring process. I initially tried to skip over some details and ended up with a malfunctioning opener. Taking the time to carefully follow the wiring instructions, even for seemingly simple steps, made a big difference. Overall, the job was well worth the effort, and the opener has been working smoothly ever since. If you’re thinking about tackling this project yourself, don’t be afraid to give it a try. It’s easier than you think, and the results are incredibly satisfying!