Table of Contents >> Show >> Hide
- Start With the “Why” (Because It’s Your Motivation on Mile 2)
- How to Pick Your First Trail (So You Don’t Accidentally Hate Hiking)
- Finding Trails: Where to Look (Beyond “Random Screenshot From a Friend”)
- Gear Basics: What You Actually Need (and What Social Media Wants You to Buy)
- Hiking Safety 101: Don’t Be the “We Had to Call Search & Rescue” Story
- Trail Etiquette + Leave No Trace: Be the Hiker Everyone Likes
- A Simple “First Month” Hiking Plan (Beginner-Friendly and Actually Doable)
- Beginner Problems (and How to Fix Them Fast)
- of Real-World Experience: What Hiking Teaches You After the “Beginner Tips”
- Conclusion: Your Beginner Hiking Recipe
- SEO Tags
Hiking is basically walking… with better views, weirder snacks, and a higher chance you’ll say,
“Wait, this is the easy trail?” The good news: you don’t need to be a mountain goat, buy a $600 jacket,
or develop a deep emotional bond with a trekking pole to begin. You just need a smart plan, a few key pieces of gear,
and enough common sense to respect weather, distance, and your own limits.
This guide will walk you through how to get started in hikingwhat to wear, what to pack, how to stay safe,
how to find trails you’ll actually enjoy, and how to level up without turning your weekends into survival training.
Start With the “Why” (Because It’s Your Motivation on Mile 2)
Before you choose boots or download trail apps, decide what you want from hiking. Your “why” quietly picks your trail:
- Stress reset: Look for shaded loops, water features, and low elevation gain.
- Fitness goals: Pick moderate climbs and track your pace over time.
- Scenery and photos: Find viewpoints, ridgelines, or sunrise-friendly routes.
- Family-friendly fun: Short trails with bathrooms, picnic areas, and clear signage.
Pro tip: your first few hikes should be “leave feeling good” hikesnot “I fought the mountain and the mountain won” hikes.
If you finish your first outing thinking, “That was nice,” you’ll actually go again. Revolutionary, I know.
How to Pick Your First Trail (So You Don’t Accidentally Hate Hiking)
Beginners often choose a trail the way people choose a spicy food challenge: confidently and without reading the fine print.
Instead, use these trail-picking filters:
1) Distance + Elevation Gain: The Real Difficulty Duo
Two trails can both be “3 miles,” but one might be a gentle park stroll and the other might feel like a stairmaster
built by someone who dislikes joy. Elevation gain matters. As a starter goal:
- Distance: 2–4 miles total
- Elevation gain: modest (think “breathing harder,” not “questioning your life choices”)
2) Route Type: Loop vs. Out-and-Back
- Loop trails are great for beginners because they feel like a journey and end where you started.
- Out-and-back trails are simple: turn around when you hit your planned time or distance limit.
If you’re nervous about getting lost, start with a popular loop in a local park or a well-marked nature preserve.
3) Time Planning: Use a Turnaround Rule
The most underrated hiking skill is turning around early with zero shame. Pick a turnaround time (for example,
“we turn back at 11:30 a.m. no matter what”) so you don’t get caught finishing in the dark or in afternoon storms.
Your future self will thank youand your flashlight batteries will, too.
4) Read Recent Trail Reports Like It’s Homework That Saves Your Trip
Look for notes about mud, snow, washed-out bridges, trail closures, aggressive mosquitoes, or “parking lot was full by 8:10.”
This is how you avoid driving an hour just to stare at a “TRAIL CLOSED” sign and whisper, “Nice.”
Finding Trails: Where to Look (Beyond “Random Screenshot From a Friend”)
Trail-finding works best when you combine two things: (1) official info from land managers and (2) recent feedback from hikers.
Here’s a practical, beginner-friendly approach.
Use Official Sources First
- National parks: park websites and official park maps, plus the official NPS app with downloadable content for offline use.
- National forests:</strong official forest pages and the Forest Service’s interactive visitor map tools.
- State parks & local preserves:</strong state park websites usually list trail lengths, difficulty, and closures.
Then Add Trail Apps (Smartly)
Apps can be fantastic for discovering trails, filtering by difficulty, and reading recent conditions. Use them as a planning tool,
not your only lifeline. Always cross-check the route with an official map when possibleespecially in national forests and less-developed areas.
Maps That Make You Feel Like a Responsible Adult
If you want to level up fast, learn the basics of reading a mapeither a printed map or a topographic map.
Topo maps show terrain shape through contour lines, which helps you understand steepness, ridges, valleys, and water crossings.
Even if you love apps, having a map-and-compass mindset keeps you from being fully dependent on battery life and signal bars.
Gear Basics: What You Actually Need (and What Social Media Wants You to Buy)
Beginner hikers don’t need a garage full of gear. You need comfort, safety, and the ability to handle surprises like weather,
wrong turns, and “why did I wear cotton again?”
Footwear: Happy Feet = Repeat Hikes
For most beginners on maintained trails, you can start with either trail runners or hiking shoes.
Boots can help with ankle support and rough terrain, but they’re not mandatory for every hike.
Whatever you choose, prioritize:
- Traction: grippy soles matter on loose gravel and wet rock.
- Fit: toes shouldn’t slam the front on descents.
- Socks: moisture-wicking hiking socks reduce blister risk.
Specific example: doing a 3-mile wooded loop? Trail runners + quality hiking socks can be perfect.
Doing a rocky trail with lots of uneven steps? Hiking shoes or boots may feel more stable.
Clothing: Dress for “I Might Get Wet” and “Weather Changes”
Think layers. A simple system:
- Base layer: moisture-wicking shirt (not heavy cotton)
- Mid layer: fleece or light insulated layer if it’s cool
- Outer layer: wind/rain shell if conditions call for it
Bring one extra warm layer even if the forecast looks friendly. Forecasts are goodbut they’re not your personal hiking nanny.
Backpack: Small, Comfy, and Not a Torture Device
A daypack (roughly 15–25 liters for most people) is plenty for beginner hikes.
Make sure it sits comfortably and doesn’t bounce like a caffeinated squirrel when you walk.
Water + Food: The Two Things That Prevent “Bad Decisions”
Carry more water than you think you’ll need, especially in heat, dry climates, or sunny routes.
Pack snacks that don’t melt into sadness: trail mix, jerky, nut butter packets, granola bars, fruit, or a sandwich that isn’t 90% mayonnaise.
If your hike is longer or in remote areas, consider a water treatment method (filter, tablets, or boiling options) instead of relying on “that stream looks clean.”
Nature is beautiful, but microbes do not care about your vibes.
The “Ten Essentials”: Your Safety Baseline
You’ll hear about the Ten Essentials because they cover the most common “things went sideways” scenarios:
- Navigation: map, compass, and/or GPS tool
- Illumination: headlamp (phones don’t count as a plan)
- Sun protection: sunscreen, sunglasses, hat
- First aid: include blister care
- Knife/repair: basic multitool or repair tape
- Fire: fire starter for emergencies where legal and safe
- Shelter: emergency blanket or lightweight shelter
- Extra food: more than your “perfect day” needs
- Extra water: plus a way to treat it when appropriate
- Extra clothing: insulation/layers for changes in weather
No, you don’t need to pack like you’re starring in a wilderness reality show. But you do want a margin of safety for mistakes, delays, and weather.
Optional Gear That Helps Beginners a Lot
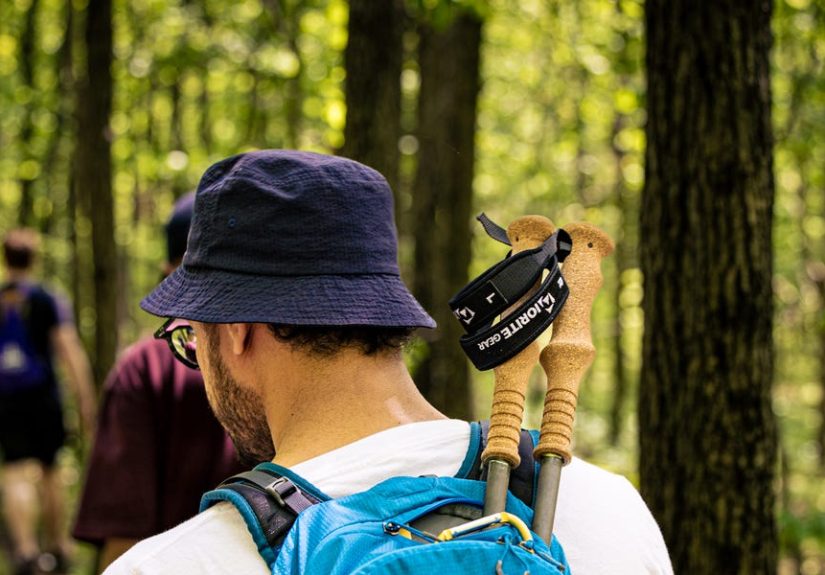
- Trekking poles: great for balance on descents and knees on climbs.
- Bug protection: repellent, long sleeves, and tick checks.
- Battery pack: for longer days (and emergency calls).
- Whistle: small, loud, and easier than yelling for help.
Hiking Safety 101: Don’t Be the “We Had to Call Search & Rescue” Story
Plan the Hike, Then Share the Plan
Before you go: know your route, estimate time, check rules, and tell someone where you’re going and when you’ll be back.
If you’re a teen, hike with friends and/or a trusted adultespecially on unfamiliar trails.
Weather: Your Most Important Trail Companion (Whether You Invited It or Not)
Check the forecast before you leave and watch the sky during the hike. If thunderstorms are possible, plan earlier in the day,
avoid exposed ridges, and be ready to turn back. Lightning is not impressed by confidence.
Also watch for heat risk (full sun + high humidity) and sudden temperature drops at elevation. Weather can change fast,
and “we’ll be fine” is not protective equipment.
Navigation: Phones Are Helpful, Not Magical
Download maps for offline use when you can. Keep your phone charged, and consider airplane mode to save battery if you don’t need signal.
For remote areas, a personal locator beacon or satellite messenger can be a serious safety upgradeespecially for solo hikers.
Even on popular trails, carry at least a basic map (digital or paper) and pay attention at intersections.
Most “lost hiker” situations begin with “We were chatting and missed the turn.”
Wildlife: Admire From a Distance
Respect wildlife by keeping space, storing food properly, and never feeding animals. Feeding wildlife makes them dependent,
bold, and more dangerousfor them and for you.
If you’re hiking in areas known for bears or other large wildlife, check local park guidance.
In some places, carrying bear spray is recommended; in others, it may be unnecessary. Local rules and conditions matter.
Ticks: Tiny, Sneaky, and Not Your Friends
In many parts of the U.S., tick prevention is a real hiking skill. Simple steps help a lot:
- Walk in the center of trails when possible and avoid brushing against tall grass and leaf litter.
- Use EPA-registered repellents as directed; treat clothing/gear with permethrin when appropriate.
- Do a full-body tick check after the hike and shower soon after coming indoors.
- Put clothes in a hot dryer if needed to help kill ticks.
Know When to Turn Back
The best hikers aren’t the ones who “always make it.” They’re the ones who make good calls early.
Turn back if:
- Weather is building fast (dark clouds, thunder, strong winds).
- You’re running low on water, daylight, or energy.
- Navigation becomes uncertain.
- The trail is more technical than expected.
The summit is optional. Getting home is the assignment.
Trail Etiquette + Leave No Trace: Be the Hiker Everyone Likes
Hiking etiquette keeps trails safe and enjoyable, and Leave No Trace protects the outdoors so it stays wild and welcoming.
The Leave No Trace framework is built around seven principles:
- Plan ahead and prepare
- Travel and camp on durable surfaces
- Dispose of waste properly
- Leave what you find
- Minimize campfire impacts
- Respect wildlife
- Be considerate of other visitors
Practical examples:
- Stay on the trail even when it’s muddygoing around widens trails and increases erosion.
- Pack out trash, including food scraps (orange peels are not magical forest fertilizer).
- Keep noise reasonable so others can enjoy the outdoors and wildlife isn’t stressed.
- Yield smartly: common etiquette is to give space on narrow trails and be predictable and friendly.
A Simple “First Month” Hiking Plan (Beginner-Friendly and Actually Doable)
Week 1: The Confidence Builder
Choose a 2–3 mile trail with clear signage. Pack water, snacks, a light layer, and a headlamp.
Focus on pacing: slow enough that you can talk without gasping like a malfunctioning vacuum.
Week 2: Add a Little Elevation
Pick a trail with moderate climbing. Practice “short steps, steady breathing.”
Notice how effort changes on slopes and how your water needs shift.
Week 3: Practice Navigation Skills
Use an official map plus an app. Identify key junctions before you start.
At each junction, pause and confirm direction. This habit feels nerdy until it saves your whole day.
Week 4: Longer Day Hike (With a Real Turnaround Time)
Try 4–6 miles if the first three weeks felt comfortable.
Add one “extra safety” item (like blister care or a better headlamp) and keep refining your system.
Beginner Problems (and How to Fix Them Fast)
“My Feet Are Destroyed” (Blisters)
- Wear moisture-wicking socks and properly fitting shoes.
- Use blister tape/hotspot patches at the first sign of rubbing.
- Keep toenails trimmedtiny detail, huge impact.
“I Brought Water, But It Wasn’t Enough”
- Bring more than you think, especially in heat.
- Start hydrated; don’t try to “catch up” later.
- For longer hikes, plan refill options only if you can treat water safely.
“I Got Off Trail for a Second… and Now Nothing Looks Familiar”
- Stop moving. Calm down. Check your map and last known point.
- Backtrack to the last clear marker if safe and feasible.
- If truly lost, stay put, conserve battery, and signal for help as needed.
of Real-World Experience: What Hiking Teaches You After the “Beginner Tips”
Here’s the part no one tells you: your first few hikes are less about conquering nature and more about learning your own patterns.
You learn what “I’m fine” feels like versus what “I’m pushing too hard” feels like. You learn whether you’re a steady sipper or
the kind of person who forgets water exists until you’re suddenly thirsty enough to consider licking a rock (don’t do that).
You also learn that the outdoors has a sense of humor. The forecast might say “10% chance of rain,” which is meteorologist code for
“bring a light shell if you enjoy being comfortable.” On one early hike, a small group might start in cool morning air feeling smug in
short sleevesthen hit a windy viewpoint and immediately understand why layers are considered wisdom, not fashion. That’s the moment
you stop thinking of an extra jacket as “extra weight” and start thinking of it as “future happiness.”
Another universal beginner experience: the snack revelation. On a normal day, you might forget to eat lunch and feel mostly okay.
On a hike, your body files a complaint with HR the second you ignore calories. The fix is simple: eat before you feel hungry.
Many hikers develop a “scheduled snacking” rhythmsomething small every hour or sobecause it keeps energy steady and moods friendly.
(No one wants to argue about directions with someone who’s hangry on a hillside.)
Navigation is another place where experience changes you. At first, you might rely on the blue dot on your phone like it’s a superhero.
Then you have one moment where signal disappears, the map doesn’t load, or your battery drops faster than expectedand you realize why people
keep saying “download offline maps” and “know your route.” The confidence boost from identifying a trail junction on a map and choosing the right turn?
Weirdly satisfying. Like you just passed a tiny wilderness pop quiz.
Hiking also teaches you pacing in a way gyms rarely do. The winning strategy is not “go fast now and suffer later.”
It’s “go steady now so later still exists.” Beginners often speed up on flat ground, then hit a climb and feel like the trail betrayed them.
With time, you learn to keep a conversational pace, shorten your stride uphill, and take quick “standing breaks” instead of long sit-down breaks
that make it harder to get moving again.
Finally, you gain a new appreciation for small safety habits that look boring on paper but feel brilliant in real life:
telling someone your plan, carrying a headlamp even on short hikes, doing a quick tick check, and turning back early when weather changes.
These habits don’t make you “less adventurous.” They make you the kind of hiker who gets to keep hiking for yearsbecause you’re protecting your future trips.
Conclusion: Your Beginner Hiking Recipe
Getting started in hiking is less about buying “the perfect gear” and more about building a reliable system:
pick a beginner-friendly trail, pack the essentials, respect weather, use maps wisely, and keep your ego on a short leash.
Start small, learn what works for your body and your environment, and add distance and difficulty gradually.
Do that, and hiking becomes the easiest “healthy habit” you’ll ever fall intobecause it feels like fun, not punishment.