Table of Contents >> Show >> Hide
- Step 1: Understand What “Using HTML” Really Means
- Step 2: Plan the Calculator Before You Type a Single Tag
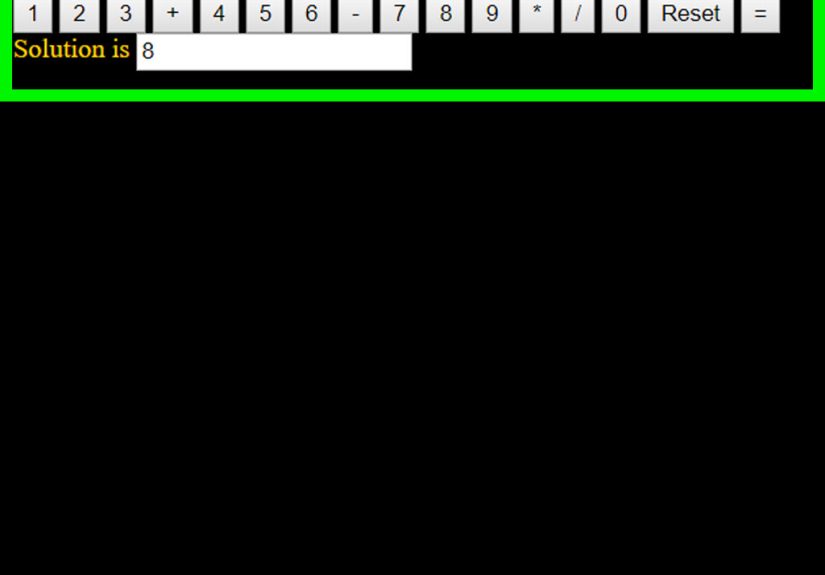
- Step 3: Write Clean, Semantic HTML for the Calculator Layout
- Step 4: Style the Calculator So It Looks Like an App, Not a Spreadsheet Accident
- Step 5: Add the JavaScript Logic That Makes the Calculator Work
- Step 6: Handle Decimals, Errors, and Small But Important Details
- Step 7: Add Keyboard Support and Accessibility
- Step 8: Test the Calculator Like a Slightly Suspicious User
- Step 9: Polish the Project for Publishing and Future Upgrades
- Conclusion
- Experience and Lessons Learned From Building an HTML Calculator
If you have ever looked at a calculator and thought, “That little rectangle of buttons seems innocent enough,” congratulations: you are exactly the kind of person who ends up building one for fun. Creating a calculator is one of the best beginner-friendly web projects because it teaches you how the three musketeers of the web work together: HTML gives the app structure, CSS makes it presentable, and JavaScript handles the actual math. In other words, HTML is the skeleton, CSS is the outfit, and JavaScript is the brain that remembers what the plus sign is supposed to do.
This guide walks through nine practical steps to create a simple calculator using HTML. Along the way, you will learn how to plan the layout, write clean markup, style buttons, connect events, handle common calculator behaviors, and polish the result so it feels like a tiny real-world app instead of a school assignment that only works when the moon is in the right phase. By the end, you will have a strong foundation for building a basic calculator and expanding it into something smarter.
Step 1: Understand What “Using HTML” Really Means
Let’s clear up the biggest misunderstanding first. A working calculator is not built with HTML alone. HTML creates the visible parts of the calculator, such as the display area, number buttons, operator buttons, and utility controls like clear or delete. CSS makes those pieces look like an actual calculator instead of a pile of nervous rectangles. JavaScript makes the buttons do math.
That is not a technicality. It is the whole game. If your goal is to create a calculator using HTML, think of HTML as the starting point and the structure that supports everything else. Once you accept that, the project becomes much easier to understand. You are not “cheating” by using CSS and JavaScript. You are building a proper web app.
Step 2: Plan the Calculator Before You Type a Single Tag
Before writing code, decide what your calculator needs to do. A simple version usually includes digits from 0 to 9, a decimal point, the four basic operators, an equals button, and a clear button. Many beginners also add a delete or backspace key because people make mistakes, and calculators without a correction button tend to feel a little judgmental.
Sketch the layout on paper or in a notes app. A common design includes:
- A display screen at the top
- A grid of buttons underneath
- Wider emphasis on the equals button or zero button
- Separate styling for operators and actions
This small planning step saves time later because you already know which elements your HTML needs. It also helps you think like a developer instead of a keyboard roulette champion.
Step 3: Write Clean, Semantic HTML for the Calculator Layout
Now build the structure. Use meaningful HTML elements and real button elements instead of clickable generic containers. That makes your calculator easier to style, easier to script, and better for keyboard users and assistive technology.
Here is a simple HTML structure:
This markup is simple and scalable. The data-value and data-action attributes help JavaScript understand what each button is supposed to do. That means less messy code later and fewer dramatic sighs from your future self.
Step 4: Style the Calculator So It Looks Like an App, Not a Spreadsheet Accident
With the HTML in place, it is time to make the calculator look polished. CSS Grid is a great choice for arranging buttons because calculators naturally fit into rows and columns. Keep the display large and readable, use consistent spacing, and give action buttons a different visual treatment so users can understand the interface instantly.
Try a starter CSS block like this:
Good calculator design is about clarity. Users should be able to glance at the interface and instantly know what does math, what clears the screen, and where to look for the result. That is good user experience, and yes, search engines tend to like pages people actually enjoy using.
Step 5: Add the JavaScript Logic That Makes the Calculator Work
Now comes the fun part: giving your calculator a brain. A beginner-friendly approach is to store the current number, the previous number, and the selected operator. When the user clicks a digit, it updates the current number. When the user clicks an operator, the app saves the current value and waits for the next one. When the user clicks equals, the app performs the calculation and shows the result.
Here is a basic JavaScript example:
This method is safer and easier to understand than using eval(). Sure, eval() looks tempting because it can process expressions quickly, but it is not the best choice for a beginner project you want to build well. Explicit math logic is easier to debug, easier to expand, and less likely to turn your calculator into an accidental chaos machine.
Step 6: Handle Decimals, Errors, and Small But Important Details
The difference between a calculator that “technically works” and one that feels polished often comes down to details. For example, users should not be able to enter multiple decimal points in the same number. Dividing by zero should not crash the app. Pressing delete on a one-digit number should restore the display to 0 instead of leaving it blank like a moody silent treatment.
You should also think through issues like:
- What happens when the result is a long decimal?
- Should the calculator start fresh after a completed equation?
- Should clicking another operator replace the current one?
- What happens if the user presses equals without a second number?
These edge cases are where real learning happens. Anyone can make buttons appear. Making them behave sensibly is what turns a demo into a decent project.
Step 7: Add Keyboard Support and Accessibility
If your calculator only works with mouse clicks, it is useful. If it also works with keyboard input, it starts feeling professional. Support the number keys, the decimal point, Enter for calculation, Backspace for delete, and Escape for clear. Keyboard support improves usability and makes the app more accessible.
Here is a simple pattern:
Accessibility also starts with semantic HTML. Real button elements are better than generic clickable boxes because they naturally support interaction and help assistive technologies understand what is happening. In short, use the right elements for the job. The browser will thank you, and some users may silently thank you too, which is still a win.
Step 8: Test the Calculator Like a Slightly Suspicious User
Once your app works, do not stop there. Test it the way an actual user would. Click buttons in odd orders. Try typing two decimals. Try dividing by zero. Mash the equals key a few times. Use the keyboard only. Resize the page on a phone-sized screen. A calculator is a small project, but it still deserves real testing.
A practical test checklist includes:
- Basic addition, subtraction, multiplication, and division
- Decimal calculations
- Clear and delete behavior
- Keyboard support
- Long-number display behavior
- Small-screen layout and button spacing
Testing is not glamorous, but it is what separates “look what I built” from “look what I built, and it actually behaves itself.”
Step 9: Polish the Project for Publishing and Future Upgrades
Once the calculator works, take a final pass through the project. Clean up your class names, organize your CSS, and make sure your JavaScript is readable. If you plan to publish the article or tutorial on the web, use a clear title, descriptive headings, and natural keyword placement. Search-friendly content does not mean robotic content. It means helpful, readable content that answers what people are really searching for.
You can also improve the calculator with extra features, such as:
- A history panel for previous calculations
- Percentage and plus/minus buttons
- Dark and light themes
- Scientific functions like square roots and exponents
- Responsive animations for button presses
That is the beauty of a calculator project: it starts simple, but it has plenty of room to grow. Today it is a basic four-function tool. Tomorrow it might become a sleek mini app in your portfolio that quietly tells employers, “Yes, I know what I’m doing, and no, I did not build this with duct tape.”
Conclusion
Building a calculator using HTML is one of the smartest entry points into front-end development because it teaches structure, style, logic, testing, and user experience in one compact project. HTML gives the calculator its layout, CSS makes it usable and attractive, and JavaScript brings the calculations to life. When you break the process into clear steps, the project feels less intimidating and much more fun.
The most important lesson is not just how to build a calculator, but how to think while building one. Plan the interface, choose semantic elements, write clean styles, handle events carefully, and test the awkward little edge cases that love to appear uninvited. That mindset carries into every future project you create. Start with a calculator, and you are already practicing the habits of a real web developer.
Experience and Lessons Learned From Building an HTML Calculator
One of the most interesting things about building a calculator is how quickly a “tiny beginner project” turns into a surprisingly useful teacher. On paper, the task sounds easy: make buttons, show numbers, do math. In practice, it reveals how much careful thinking goes into even the smallest web app. The first version many beginners build usually looks fine, but the second someone clicks the decimal button twice or divides by zero, the project starts exposing all its little secrets.
A common early experience is realizing that layout and logic are totally different challenges. The HTML part often feels straightforward. You create a display, add buttons, and arrange everything in a neat grid. That part can feel satisfying right away because the calculator suddenly looks real. Then JavaScript enters the chat wearing sunglasses and asking whether you really understood state management. The moment you try to remember a previous value, track an operator, and update the current display correctly, the project becomes less about typing code and more about thinking clearly.
Another lesson is that user experience matters far more than beginners expect. For instance, a calculator that allows multiple decimal points in one number technically accepts input, but it does not feel trustworthy. A calculator with no delete button works, but it feels clumsy. A calculator that only supports mouse clicks may pass a basic demo, but keyboard support makes it feel complete. These details teach an important principle: software is not just about whether it runs. It is about whether it behaves in a way that feels natural to humans.
Many developers also learn the value of writing explicit logic instead of chasing shortcuts. Using a quick expression evaluator may seem like the easy path, but a project becomes much easier to understand when each operator is handled intentionally. That structure also makes future upgrades easier. Want to add percentages, memory buttons, or scientific functions later? Clean logic gives you room to grow. Messy shortcuts often give you a headache with extra toppings.
Perhaps the best part of the experience is confidence. A calculator is small enough to finish, but rich enough to teach real front-end skills. After building one, beginners usually understand the relationship between HTML, CSS, and JavaScript much more clearly. They also see how testing, accessibility, and edge cases are not “advanced extras.” They are part of building something responsibly. That is a huge shift in mindset, and it is exactly why this project remains such a classic. It is not just about creating a calculator. It is about learning how web development really works, one button press at a time.
Note: Although this guide is titled “How to Create a Calculator Using HTML,” a working web calculator uses HTML for structure, CSS for presentation, and JavaScript for interactive math logic.