Table of Contents >> Show >> Hide
- Why This Project Works (A Quick Reality Check)
- Materials and Tools
- Cut List (Per R2-D2)
- Step-by-Step Build
- How to Make Them Hold Books Like Pros
- Painting and Detailing: Turning Lumber into R2-D2
- Bedroom Decor Tips: Make the Shelf Look Intentional
- DIY Variations and Nerdy Upgrades
- Troubleshooting
- Safety Notes
- Extra : Real-World Build Experiences
- SEO Tags
Every bookshelf has a job: keep stories standing tall and keep chaos from sliding into a sad little paper avalanche. These DIY R2-D2 bookends do both-while looking like they just rolled in from a galaxy far, far away to organize your bedroom.
The Hometalk-style idea is refreshingly practical: build two chunky mini “droids” from basic 2×4 and 2×2 lumber, shape the head, add feet, then paint and detail until the silhouette screams R2-D2 (in the friendliest beep-boop voice possible). No complicated joinery. No rare materials. Just a fun weekend project with a high “wait, you made that?” payoff.
Why This Project Works (A Quick Reality Check)
Bookends are basically a physics test. The heavier and wider the base, the less they scoot when books lean. A 2×4 body gives weight; 2×2 legs and feet give stability. Add non-slip pads and a protective topcoat, and you’ve got bedroom decor that’s both adorable and functional.
Materials and Tools
Materials
- 2×4 and 2×2 lumber (scrap-friendly)
- Wood glue (recommended), brad nails or screws
- Primer + white paint + blue paint; small black/gray accents
- Silver paint or silver vinyl for the dome
- Painter’s tape, paint marker or fine brush
- Clear topcoat (water-based poly or clear spray)
- Felt/cork/rubber pads (for grip and furniture protection)
Tools
- Miter saw or hand saw
- Sander or sandpaper (80, 120, 220 grit)
- Clamps (helpful), nail gun or hammer
- Utility knife/scissors (if using vinyl)
Cut List (Per R2-D2)
One popular cut list for each bookend uses:
- 1 piece of 2×4 cut to 8 inches (body)
- 2 pieces of 2×2 cut to 5 inches (legs)
- 2 pieces of 2×2 cut to 4 inches (feet)
Angles: Cut the ends of the 4-inch feet at about 30 degrees for a more “R2 stance.” For the dome look, clip the top corners of the 2×4 body at about 45 degrees, then sand them softer and rounder.
Step-by-Step Build
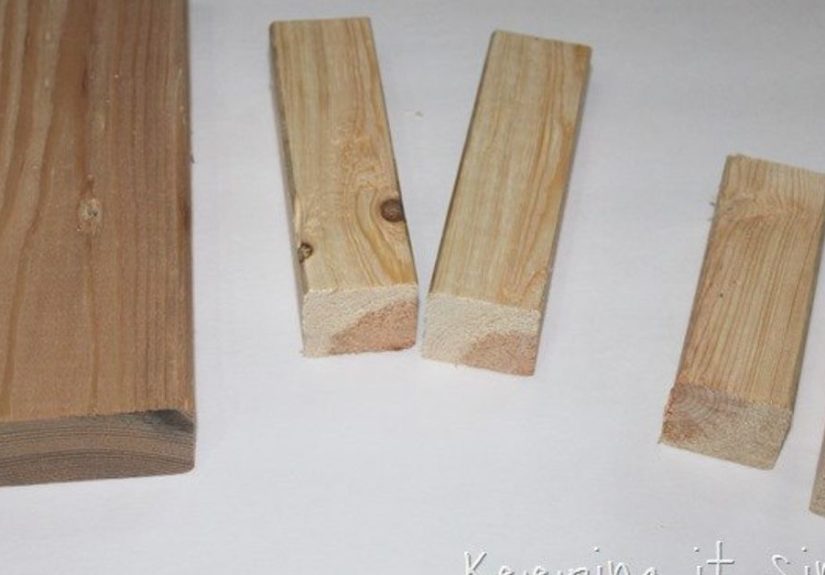
1) Cut and label your pieces
Batch-cut everything first (especially if you’re making a pair). Label “body,” “legs,” and “feet” in pencil. This keeps the build fast and prevents the classic DIY mistake: “Why do my two feet look like they belong to different droids?”
2) Shape the feet and head
Trim the feet ends at 30 degrees. Clip the top corners of the body at 45 degrees to suggest a dome. Don’t chase perfection-clean symmetry is what makes the robot read correctly.
3) Sand for paint
Start with 80-120 grit to remove splinters and sharp edges, then finish with 220 grit. Spend extra time on corners and the “head.” Your paint will look smoother, your vinyl will stick better, and nobody will snag a sleeve on a surprise splinter.
4) Assemble legs to feet
Glue and nail (or screw) each leg onto a foot. Keep everything square. If you have clamps, use them-wood is much more cooperative when it’s gently bullied into place.
5) Attach legs to the body
Fasten the two legs to the sides of the body. Many DIYers leave a small gap below the body so the legs look slightly separate-more R2-D2, less “wooden rectangle with shoes.” Let glue cure fully before painting.
How to Make Them Hold Books Like Pros
If you’re only holding a few paperbacks, the weight of the wood may be enough. If you want these to tame heavy hardcovers, add one of these upgrades:
Upgrade A: Non-slip pads (do this no matter what)
Stick rubber bumpers, cork, or felt pads under the feet. It adds grip and prevents scratches on dressers and shelves.
Upgrade B: A hidden plywood “tongue”
Cut a thin plywood base that extends 4-6 inches forward under the books. Attach it to the underside of the feet with glue and short screws. The books’ weight presses down on the base, dramatically improving stability.
Painting and Detailing: Turning Lumber into R2-D2
1) Prime first
Primer helps paint adhere and keeps raw wood from soaking up your color. After primer dries, lightly sand with 220 grit and wipe clean for a smoother finish.
2) Base coat in white
Apply two thin coats instead of one thick one. If the surface feels “fuzzy” after the first coat, a quick sand between coats is normal and worth it.
3) Add blue panels with tape
Use painter’s tape to block out simple rectangles and bands. Press the tape edge down firmly (a plastic card works) so you get crisp lines. Paint in light coats and peel the tape slowly for the cleanest edge.
4) Dome details with silver paint or silver vinyl
Silver paint works great if you go thin and patient. If you like the super-clean look of vinyl, a common approach is two side pieces around 3 1/2 inches wide x 3 3/4 inches long, plus a top strip around 1 3/8 inches wide. Smooth the vinyl from the center outward to avoid bubbles.
5) Finish the “face” details
Add the black “eye,” small gray shapes, and tiny linework with a paint marker or fine brush. You don’t need every panel perfect-your shelf-viewing audience is not an industrial inspection team. They are your family, your friends, and your dog.
6) Seal it
Bookends get slid and bumped. A clear topcoat helps prevent chips and makes the surface easier to wipe clean. For bedroom decor, a water-based polyurethane or clear spray topcoat is usually plenty durable.
Bedroom Decor Tips: Make the Shelf Look Intentional
- Give the droids breathing room: leave a little empty space so the details read clearly.
- Echo one color: repeat the R2 blue in a frame, storage bin, or throw pillow for a cohesive look.
- Mix book orientations: stack a few books horizontally to break up tall vertical lines and highlight the bookends.
- Use them beyond books: they’re also great for holding binders, comic collections, or sketchbooks.
DIY Variations and Nerdy Upgrades
Once you’ve built the basic shape, you can tune the look to match the room (and the fan level of the person who lives there).
Choose your finish: fresh droid or battle-tested droid
For a clean “new out of the shop” R2-D2, keep the paint smooth and use a satin clear coat. If you want a more cinematic vibe, lightly sand edges after painting to reveal hints of wood, then add a few subtle gray scuffs with a nearly dry brush. Keep weathering minimal-bookends live indoors, not on Tatooine.
Stencil instead of vinyl
No cutting machine? No problem. Print a simple panel layout, cut the shapes from cardstock, and trace them lightly in pencil. Paint inside the lines with a small brush, or tape off rectangles for a graphic, modern take. Imperfect details still read as R2-D2 as long as you keep the big cues: white body, blue panels, and a darker “eye” area.
Make them shelf-friendly for kids
If you’re building these for a child’s room, consider rounding all edges a little more and using felt pads (so the bookends don’t scratch furniture). Kids can help with low-stakes steps like choosing the blue shade, painting the white base coat, or placing the pads-then you handle the cutting, sanding, and sealing.
Add a “book series zone”
These bookends are perfect for creating a dedicated spot: one shelf for Star Wars novels, one for comics, one for school binders. If the shelf gets crowded, split the set-place one R2-D2 on a different shelf as a repeat accent. It ties the room together without making the space feel themed in a loud, overwhelming way.
Troubleshooting
- Tape bleed: burnish the edge firmly and use lighter paint passes near the tape line.
- Paint drips: too much paint at once-sand the drip when dry and recoat thinly.
- Vinyl lifts: paint may be dry but not fully cured; wait longer and clean dust before applying.
- Bookends slide: add rubber pads, then add the plywood base if needed.
- Wood splits while nailing: pre-drill or switch to screws; knots can be unpredictable.
Safety Notes
Cutting and sanding wood creates dust. Work in a ventilated area, wear eye protection, and use a dust mask or respirator when sanding. Clamp pieces whenever possible, keep hands clear of blades, and don’t rush cuts-Star Wars decor is fun, but fingers are non-refundable.
Extra : Real-World Build Experiences
DIY looks effortless online because nobody films the part where you stare at a 2×4 like it personally offended you. Here’s what the build usually feels like in real life, and how to keep it fun (and not a “why did I start this” spiral).
Lumber shopping has plot twists. In the store, the board looks fine. At home, it’s suddenly warped. For bookends, straight boards make everything easier because both droids will sit flat and look symmetrical. If you can, pick 2x4s with fewer twists and cracks. Small knots are okay-just place them on the back or low on the body where paint details won’t need a perfectly smooth canvas.
The 45-degree head cuts are the confidence test. Cutting off corners feels scary because it’s irreversible, but the great news is that sanding turns those sharp facets into a convincing dome quickly. The main trick is to make your cuts consistent on both sides. Once you sand, your eye reads “rounded robot head” even if it’s not mathematically perfect.
Sanding is the quiet hero. A 2×4 is rough by nature, and paint loves to highlight roughness like it’s trying to win an award. If the wood feels fuzzy after primer or the first coat of paint, that’s raised grain-totally normal. Lightly sanding between coats is what upgrades the finish from “camp craft” to “nice bedroom decor.” It’s also the moment when the project stops looking like lumber and starts looking like a character.
Paint behaves better when you stop asking it to do miracles. Thick coats feel efficient, but they’re the main reason for drips, sticky fingerprints, and smeared corners. Thin coats feel slower, yet they dry faster and look cleaner. If your white coat looks streaky at first, let it dry and add another thin layer. The same goes for blue panels: it’s easier to build color than to fix a run.
Tape is either magical or mildly rude. Crisp lines come from two things: pressing the tape edge down firmly and applying paint lightly. If you “flood” paint into the edge, it can seep underneath. If you remove tape too late, dried paint can tear jaggedly. A good rhythm is: tape -> press edge -> paint thinly -> peel carefully. If you still get a little bleed, tiny touch-ups with a paint marker are fast and surprisingly invisible once the books are in place.
Vinyl details are worth it-if you let the paint cure. Vinyl looks super clean on the dome and panels, but it hates dust and semi-dry paint. If you can, give the paint time to fully cure before applying vinyl (especially on humid days). When smoothing vinyl, start in the middle and work outward. A small bubble isn’t the end of the world; it’s usually invisible from normal shelf-viewing distance, which is about three feet away while someone says, “Oh wow, that’s R2!”
The first “book test” teaches you what you actually built. Paperbacks are easy; hardcovers are honest. If the droid slides, add rubber feet. If it still slides, add the hidden plywood base. That base is the difference between a cute decor object and a real bookend that can wrangle textbooks, binders, or a growing comic collection.
Finally: styling is the victory lap. Once everything is sealed and dry, put the bookends on the shelf and leave a little empty space around them. R2-D2 details get lost when crowded by tiny toys and clutter. Let the droids be the visual anchor, then echo their blue color with one other item on the shelf. The result looks intentional, not accidental-and it makes the whole bedroom feel more put together.