Table of Contents >> Show >> Hide
- What Is a Dryer Vent, Exactly?
- Why Dryer Vents Matter More Than Most People Think
- Main Parts of a Dryer Vent System
- Types of Dryer Vents and Duct Materials
- How Long Can a Dryer Vent Be?
- How to Measure Dryer Vent Length the Right Way
- Common Dryer Vent Mistakes
- Signs Your Dryer Vent Needs Cleaning or Repair
- Basic Dryer Vent Maintenance Tips
- Dryer Vent vs. Ventless Dryer: A Quick Reality Check
- Bottom Line
- Real-World Experiences and Lessons From Dryer Vent Setups
- SEO Tags
If the phrase dryer vent makes you think of “that silver tube hiding behind the dryer like it owes rent,” you are not alone. Most people do not think much about dryer venting until clothes take forever to dry, the laundry room feels like a sauna, or somebody says the word “lint” in a very concerned tone. Then suddenly, the humble dryer vent becomes the star of the household safety meeting.
A dryer vent is one of those home systems that seems boring right up until it is not. It affects drying time, energy use, appliance life, moisture control, and fire safety. So yes, it is just a vent. But it is also the difference between a dryer that works like a champ and a dryer that turns every towel load into an all-day event.
In this guide, we will break down what a dryer vent actually is, how it works, the most common dryer vent types, how vent length affects performance, and what homeowners should know before installing, replacing, or cleaning one. Consider this your no-nonsense, low-drama overview of the part of your laundry setup that does the dirty work without asking for applause.
What Is a Dryer Vent, Exactly?
A dryer vent is the exhaust pathway that carries hot, moist, lint-filled air from a vented clothes dryer to the outdoors. In plain English, it is the route your dryer uses to get rid of heat, humidity, and tiny fabric fuzz before those things make a mess of your home.
People often use the term dryer vent to describe several different parts at once. That is where the confusion starts. The phrase can refer to the transition duct behind the appliance, the rigid metal exhaust duct running through the wall or ceiling, or the exterior vent hood where the air exits the house. Technically, the full vent system includes all of those pieces working together.
It is also worth noting that not every dryer needs one. Vented dryers need a dryer vent because they exhaust damp air outside. Ventless dryers, including many condenser and heat-pump models, do not use a traditional exterior vent at all. So if you are shopping for a new appliance, make sure you are not mixing up vented-dryer rules with ventless-dryer design.
Why Dryer Vents Matter More Than Most People Think
A good dryer vent does four important jobs. First, it removes moisture from the dryer drum so your clothes can actually dry instead of just getting warm and emotionally exhausted. Second, it helps move lint out of the system before it settles where it should not. Third, it allows the dryer to breathe, which improves efficiency and reduces wear on the appliance. Fourth, it helps lower safety risks by preventing heat and lint from building up in all the wrong places.
When a dryer vent is poorly installed, too long, crushed, clogged, or made from the wrong material, airflow drops. Once airflow drops, everything gets worse. Dry times get longer. Energy use goes up. The appliance works harder. Moisture can collect in the laundry area or inside the duct. Lint starts gathering like it is building a tiny sweater factory in your wall. That is why dryer venting is not just a “nice to have.” It is part performance issue, part maintenance issue, and part safety issue.
Main Parts of a Dryer Vent System
1. The transition duct
This is the short section that connects the dryer outlet to the wall or floor exhaust connection. It is usually exposed behind the appliance. In many homes, this is the part people see and assume is the entire dryer vent. It is not. It is just the handshake between the dryer and the main duct system.
2. The exhaust duct
This is the longer run that carries air from the transition area to the outside of the house. It may travel through a wall, crawl space, basement, or ceiling cavity. This section should be smooth, sturdy, and sized correctly so air can move fast enough to carry lint along instead of letting it settle inside.
3. Elbows and fittings
These are the bends and connectors that help the duct change direction. Every turn affects airflow. In dryer venting, bends are not free. Each one adds resistance, and resistance is the enemy of good drying performance.
4. The exterior termination hood
This is the outside vent cap or hood where the air leaves the home. A proper termination should open when the dryer runs and close when it stops. It should not have a screen or cage that traps lint. That little flap is not glamorous, but it has an important job and deserves a little respect.
Types of Dryer Vents and Duct Materials
Not all dryer vent materials are created equal. Some help airflow. Some fight airflow like it is a personal grudge. Choosing the right type matters.
Rigid metal dryer vent
This is generally the gold standard for the main duct run. Rigid metal duct, usually aluminum or galvanized steel, has a smooth interior that helps air move efficiently and makes it harder for lint to get hung up inside. It is durable, code-friendly in many installations, and widely recommended for concealed runs.
If you want the short version, here it is: smooth metal is the grown-up choice. It is boring in the best possible way.
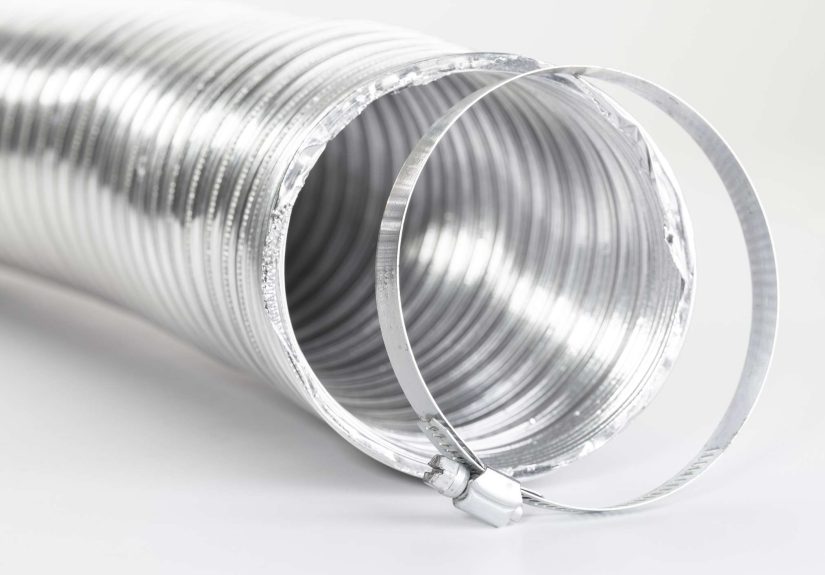
Semi-rigid metal duct
Semi-rigid metal duct is often used for the transition section behind the dryer. It offers more flexibility than rigid metal while still performing far better than flimsy plastic-style options. It works well when you need a little bend without turning the whole system into an accordion of regret.
Slim or periscope dryer vent
A slim or periscope vent is designed for tight spaces where the dryer sits close to the wall. It is typically made of rigid aluminum sections with a narrow profile. These are useful when there is not enough room for a typical round transition duct without crushing it. In small laundry closets, a periscope vent can be the hero nobody expected.
Foil-style transition duct
This is where homeowners should slow down and read the fine print. Foil-style ducts show up in many stores and vent kits, but they are not the best all-purpose answer. Some manufacturer-approved, UL-listed transition products may be acceptable in exposed transition applications, depending on the dryer and installation instructions. But they should never be concealed inside a wall, floor, or ceiling, and they are still more prone to trapping lint than a smooth metal solution.
In other words, just because it is sold near the dryer aisle does not mean it deserves a long-term relationship with your house.
Plastic or vinyl flex duct
This is the one to avoid. Plastic or vinyl dryer ducting is widely discouraged because it can sag, trap lint, restrict airflow, and create bigger safety problems. It is basically the dryer vent version of wearing flip-flops to a construction site. Technically a choice, but not the choice.
How Long Can a Dryer Vent Be?
This is one of the most common questions, and the most honest answer is: it depends. There is no single universal vent length that works for every dryer and every house.
As a general code-style rule, the maximum length of the exhaust duct is often based around 35 feet, not counting the transition duct behind the dryer. But that baseline gets reduced when fittings are added, and manufacturer installation instructions can set different allowable lengths depending on the model, duct type, and vent hood style.
That means two important things. First, every elbow matters. Second, your dryer’s installation manual is not optional reading just because it is written in the thrilling literary style of appliance documentation.
Some manufacturers provide vent system charts showing allowable maximum lengths for different setups. A system with zero elbows may allow a much longer run than one with three or four turns. Certain hood types can also change the allowed length. So when people ask, “Can I run a dryer vent 25 feet?” or “Is 40 feet okay?” the right answer is to look at the actual path, fittings, and the dryer model’s instructions.
How to Measure Dryer Vent Length the Right Way
Measuring a dryer vent is not about drawing a straight line from point A to point B and calling it a day. You need to measure the actual path the duct will follow. That means following the turns, offsets, and bends as they happen in real life, not as they exist in your optimistic imagination.
Here is the practical approach. Measure from the dryer exhaust outlet to the exterior termination point along the exact route the duct takes. Then count every fitting or elbow in the system. Those fittings add resistance and count toward equivalent length. Sharp turns are worse than gentle ones, and extra bends can quickly eat up the allowable maximum.
The best setup is still the simplest: shortest route, fewest turns, smooth metal walls, and no crushed sections. Dryer vents love a straight shot to the outdoors. They are not fans of scenic routes.
Common Dryer Vent Mistakes
Dryer vent problems usually come from a short list of repeat offenders. One of the biggest mistakes is using the wrong material, especially plastic or low-quality flex duct. Another is making the vent run too long or stuffing too many elbows into the system. A third is crushing the duct behind the dryer when the appliance gets shoved back into place with all the subtlety of a shopping cart.
Other common mistakes include venting into an attic, crawl space, garage, or other enclosed area instead of the outdoors; using screws that protrude into the duct and catch lint; installing a screened vent hood that clogs over time; and forgetting that the outside flap needs inspection too. The vent does not stop needing attention just because it lives outdoors now.
Signs Your Dryer Vent Needs Cleaning or Repair
Your dryer vent usually sends warning signs before things get really bad. You just have to notice them.
If clothes take longer than usual to dry, that is a classic clue. If the dryer feels unusually hot after a cycle, that is another. You may also notice a musty smell, a burning smell, extra lint around the dryer area, or a laundry room that feels humid and stuffy. Outside, the vent flap may fail to open properly when the dryer runs, or you may see lint collecting around the outlet.
These are not “someday” problems. They are “put this on the weekend list before your dryer starts auditioning for a cautionary tale” problems.
Basic Dryer Vent Maintenance Tips
Clean the lint screen every load
This is the easiest win in the laundry room. It takes seconds, costs nothing, and helps everything work better.
Inspect the vent path regularly
Check that the transition duct is not kinked, crushed, or disconnected. Make sure the outside flap opens freely and is not blocked by lint, dirt, nests, or snow.
Clean the vent system at least periodically
How often depends on use, pets, vent length, and how much lint your household produces. Heavy laundry loads, long duct runs, and pet hair usually mean more frequent cleaning. If your dryer is working harder than it used to, do not wait for a calendar reminder to tell you something is off.
Replace bad duct materials
If you discover plastic flex duct, damaged foil-style ducting, or a transition hose that looks one sneeze away from collapse, replacing it with a safer and more effective setup is usually a smart move.
Dryer Vent vs. Ventless Dryer: A Quick Reality Check
Because more homeowners are considering heat-pump and condenser models, it helps to say this clearly: a traditional dryer vent is only part of the picture for vented dryers. Ventless dryers do not send moist air outside through a duct. Instead, they manage moisture internally through a different design.
That does not make one type automatically better for every home. Vented dryers remain common and often dry faster, while ventless models can be useful where exterior venting is difficult or impossible. The right choice depends on layout, budget, performance expectations, and installation limits.
Bottom Line
So, what is a dryer vent? It is the exhaust system that lets a vented dryer move hot, damp, lint-filled air safely out of your home. That simple function affects almost everything about dryer performance, from dry times and energy efficiency to maintenance and safety.
The best dryer vent setups are usually straightforward: a smooth metal duct, a short and direct path to the outdoors, as few bends as possible, a proper exterior hood, and routine cleaning. The wrong setup, on the other hand, can turn a basic laundry appliance into a moisture machine, a lint collector, and an expensive lesson in why home details matter.
If you remember only one thing, make it this: a dryer vent is not just a hose. It is a system. And like most home systems, it works best when it is simple, solid, and not treated like an afterthought hiding behind a wall of towels.
Real-World Experiences and Lessons From Dryer Vent Setups
In real homes, dryer vent problems rarely announce themselves with a dramatic speech. They show up as small annoyances at first. A family moves into an older house and notices the towels are still damp after one cycle. Nobody panics. They just run the dryer again. Then again. A month later, the utility bill creeps up, the laundry room feels warmer than it should, and someone finally pulls the dryer away from the wall. Behind it sits a crushed transition duct that looks like it lost a fight with a recliner. Replace that section with a better-fitting metal transition piece, clean the lint out, and suddenly the dryer starts acting like it remembers its job description.
Another common experience happens during remodels. A homeowner wants a cleaner laundry room, so the dryer gets moved to a new wall. The new layout looks great in photos, but the vent path becomes longer and twistier than a detective show plot. The system may technically reach the outside, yet performance drops because the route has too many turns. In these situations, people often learn that dryer vent design is not just about whether the duct can be connected. It is about whether air can move through it efficiently. The prettier laundry room still needs physics to cooperate.
Pet owners tell a particularly relatable version of the story. Homes with dogs and cats can load a dryer vent with lint and hair much faster than expected. Everything seems fine until the dryer starts taking two cycles to finish bedding or fleece blankets. When the vent gets cleaned, the amount of fuzz that comes out is often shocking enough to inspire immediate life changes, or at least a strong promise to clean the vent more often. Pet hair does not care about your scheduling system. It will simply move in.
There are also tight-space experiences, especially in condos, closets, and small laundry nooks. People push the dryer back to reclaim a few inches and accidentally kink the hose. The machine still runs, so the problem goes unnoticed. Later, they discover that a slim periscope-style connection would have fit the space better and reduced stress on the duct. That is a classic dryer vent lesson: the cheapest or easiest part is not always the smartest one.
Then there is the outdoor vent hood issue, which many homeowners forget entirely. The inside connection gets attention, but the exterior flap quietly collects lint, dirt, or even nesting debris. Someone finally checks it after noticing weak airflow outside and realizes the vent has been trying to exhale through a partial blockage. A quick cleanup improves performance right away. It is one of those experiences that makes people say, “I cannot believe that was the problem,” which is basically the official motto of home maintenance.
The biggest takeaway from these real-world dryer vent experiences is simple: most problems start small, and most fixes are easier when caught early. Better materials, shorter runs, fewer bends, and regular cleaning solve a surprising number of laundry-room mysteries before they become expensive ones.