Table of Contents >> Show >> Hide
- Why Paint Can Lids Make Surprisingly Great Wall Art
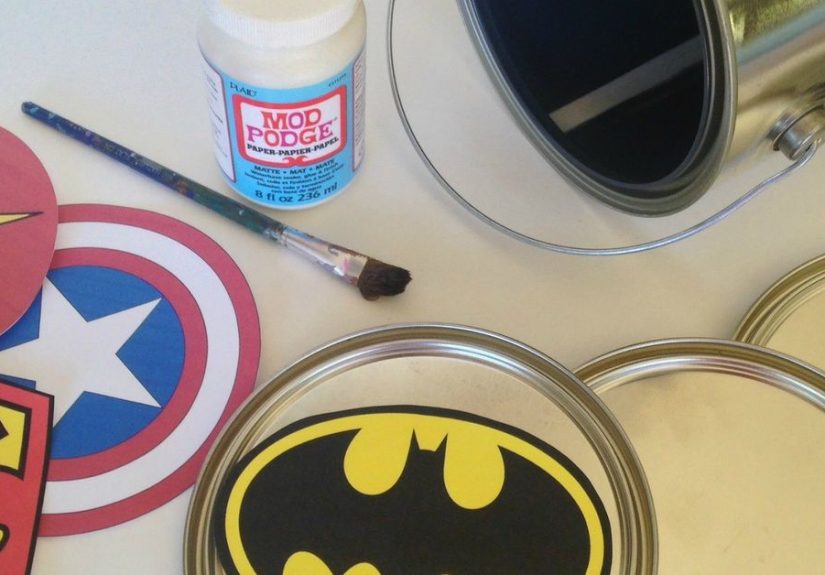
- What You Need
- How to Make Superhero Wall Decor Using Paint Can Lids
- Best Color Schemes for Superhero Wall Decor
- Creative Display Ideas
- Mistakes to Avoid
- Why This DIY Project Is Worth It
- Experiences and Creative Inspiration From Making This Kind of Decor
- Conclusion
If your walls are looking a little too “plain civilian” and not nearly enough “comic-book headquarters,” paint can lids might be the unlikely heroes you have been waiting for. Yes, really. Those round metal lids that usually end their lives in a garage corner, clinging to old paint memories and dust bunnies, can become bold, playful wall decor with superhero energy and serious budget charm.
This project works because it combines three things people love: upcycling, easy wall art, and rooms with personality. Paint can lids already have a graphic, badge-like shape, which makes them perfect for comic-inspired symbols, city skylines, lightning bolts, stars, masks, shields, and dramatic “POW!”-style designs. They are also small enough to arrange in groups, which means you can build a whole gallery wall without spending gallery-wall money. That is the kind of origin story we respect.
Best of all, superhero wall decor using paint can lids can grow with a space. In a child’s bedroom, it can feel colorful and playful. In a playroom, it can be high-energy and fun. In a teen room, it can lean graphic, bold, and modern. And if you are an adult who still believes capes are emotionally important, no judgment here. This can absolutely work in a craft room, media room, or office too.
Why Paint Can Lids Make Surprisingly Great Wall Art
Round decor pieces are useful because they soften a wall full of squares and rectangles. Most rooms already have boxy furniture, boxy shelves, boxy frames, and boxy screens. Paint can lids break that pattern. Their circular shape adds contrast, and when you repeat that shape in a group, it creates rhythm across the wall. Suddenly your decor looks intentional instead of “I found this while cleaning the garage and got inspired.”
They are also ideal for a comic-book look. Superhero-inspired spaces often rely on strong outlines, bright color blocking, metallic accents, and symbol-based visuals. Paint can lids naturally support that style because they resemble medallions, shields, badges, and emblems. Even a simple design painted in red, blue, yellow, black, and silver can feel dramatic when it sits on a metal circle.
Another reason this DIY works so well is the cost. If you already have clean lids on hand, the base material is essentially free. Even if you buy unused lids, the project can still come in far cheaper than custom wall art. Add primer, paint, adhesive letters, or decals, and you still have a budget-friendly decor project that looks custom when it is done right.
What You Need
- Clean, dry paint can lids
- Mild cleaner or degreaser
- Fine- and medium-grit sandpaper
- Metal primer
- Acrylic craft paint or spray paint suitable for metal
- Paintbrushes, foam brushes, or paint pens
- Painter’s tape or masking tape
- Stencils, letter stickers, or printable templates
- Clear sealer if desired
- Damage-free hanging strips, small hooks, or other lightweight hanging hardware
If you are making these for a child’s room, give each lid a quick edge check before you start. If any lid has rough spots, sand them smooth and skip anything bent or sharp. The goal is “super,” not “trip to urgent care.”
How to Make Superhero Wall Decor Using Paint Can Lids
1. Clean the lids properly
This step is not glamorous, but neither is paint peeling off after two days like it gave up on life. Metal surfaces need to be cleaned well so primer and paint can actually stick. Wipe away dust, grease, residue, and anything else that might interfere with adhesion. If the lid came from an old paint can, make sure all leftover paint is fully removed and the lid is dry before you do anything else.
Once the lid is clean, lightly sand the surface. You do not need to attack it like it insulted your family. Just scuff it enough to dull glossy areas and create a better surface for primer. Wipe off sanding dust before moving on.
2. Prime the metal
If you skip primer on metal, you are basically asking the paint to perform without a stage. A good metal primer helps with adhesion, improves color coverage, and can reduce the risk of rust showing up later. Use thin, even coats and let the primer dry fully according to the product instructions.
This part matters even more if you want bright superhero colors. Reds, yellows, cobalt blues, and white details all look sharper over a properly primed surface. Without primer, your vibrant comic-book palette can turn into “sad tomato,” “confused mustard,” and “blue that regrets its choices.”
3. Pick a superhero-inspired design direction
You do not need to copy a famous logo to get the superhero effect. In fact, original comic-inspired symbols usually look more creative and more personal. Think in graphic shapes and visual themes instead of exact branded emblems.
Good design ideas include:
- Lightning bolts for speed and energy
- Stars and bursts for classic comic-book action
- Mask silhouettes for mystery
- Shield-style icons for a heroic look
- Skylines with moonlight for a city-watch vibe
- Speech bubbles with words like “BAM,” “ZOOM,” or “POW”
- Monograms styled like hero badges for a personalized touch
If you are decorating a child’s room, consider building the set around that child’s interests. One lid could feature a lightning bolt, another a star, another the child’s initial, another a skyline, and another a favorite color-blocked symbol. This keeps the wall cohesive while still feeling playful.
4. Paint in layers, not in panic
Use painter’s tape for clean lines, especially if your design includes stripes, geometric shapes, or bold emblem sections. Paint thin coats rather than one heavy coat. Thin layers dry better, chip less, and usually look more polished. If you are using spray paint, apply it in controlled passes instead of trying to drown the lid all at once.
For detail work, paint pens and small brushes are your best friends. Use them for outlines, lettering, stars, comic-book dots, and dramatic edge details. Black outlines can make even a simple design feel more graphic and finished. Metallic silver or gold accents can add dimension without making the project feel too busy.
You can also add texture with decoupage paper, comic-inspired scrapbook paper, or layered cardstock elements sealed onto the surface. If you do that, keep the composition simple. One focal image per lid is usually enough. These are wall accents, not tiny museums of every craft supply you own.
5. Seal if needed
If the decor will live in a child’s room, playroom, or any space where sticky fingers and flying foam balls are part of the ecosystem, a clear sealer can help protect the finish. Choose a sealer compatible with your paint type and use a matte, satin, or gloss finish depending on the look you want.
Gloss gives the lids a bright, polished, almost toy-like finish. Satin is a great middle ground. Matte feels more modern and a little more grown-up. There is no wrong answer here, only a style choice and your tolerance for fingerprints.
6. Arrange them like a real gallery wall
This is where the project turns from “cute craft” into “actual decor.” Lay the lids on the floor first and test your arrangement before hanging anything. A symmetrical grid looks crisp and modern. A looser cluster looks playful and energetic. Either can work, but spacing matters.
Try to keep consistent space between pieces so the arrangement feels intentional. Start with the center of the grouping around eye level, then expand outward. If you are hanging the decor above a bed, desk, toy shelf, or reading nook, make sure the collection relates to the furniture below it rather than floating awkwardly near the ceiling like it missed its cue.
Use lightweight, wall-safe hanging products that match the weight of each finished piece. If some lids are more heavily embellished than others, assign the stronger strips or hooks to the heavier pieces. In other words, do not let your best “POW!” sign become a real-life pow.
Best Color Schemes for Superhero Wall Decor
Color does a lot of the heavy lifting in this style. Superhero-inspired decor tends to look best when the palette is bold, limited, and high contrast. Here are a few easy combinations that work:
Classic Comic Palette
Red, royal blue, yellow, and black. This is the most recognizable comic-book color family and it instantly feels energetic. Use white as a balancing neutral so the wall does not look like a cereal box exploded.
Modern Hero Palette
Navy, charcoal, silver, and white. This is ideal for older kids, teens, or shared rooms where you want the superhero mood without the all-out primary-color parade.
Neon Action Palette
Black background with electric blue, lime, orange, and hot pink accents. Great for a game room or creative space that wants a punchier, modern comic-book effect.
Soft Hero Palette
Muted blue, dusty red, mustard, and cream. This works if you want the concept to feel playful but still blend with more relaxed decor.
Creative Display Ideas
One of the best things about superhero wall decor using paint can lids is that you are not limited to one layout. Here are a few smart ways to display them:
- Hero badge wall: Hang six to nine lids in a neat grid, each with a different symbol.
- Name wall: Use one large initial in the center and surround it with lightning bolts, stars, and skyline lids.
- Story sequence: Arrange lids so they feel like comic-book panels, moving from city skyline to burst shape to action word.
- Reading corner accent: Hang a small trio above a bookshelf or beanbag area to create a mini themed nook.
- Desk zone upgrade: Place a row of lids above a homework or craft table to make the workspace feel more fun and personal.
If you want the collection to feel especially polished, repeat one color across all pieces. Even when the designs vary, a repeated accent color helps tie the whole arrangement together.
Mistakes to Avoid
Skipping prep: Dirty or glossy metal is not a great canvas. Cleaning and sanding may be boring, but peeling paint is worse.
Using too many colors at once: A superhero theme should feel bold, not chaotic. Limit your palette so the wall looks curated.
Overcrowding the design: A single strong icon usually looks better than five competing ideas squeezed into one lid.
Ignoring scale: Tiny lids on a huge blank wall can look lost unless you use enough of them to build visual impact.
Hanging without planning: Always test the arrangement first. Eyeballing everything is brave, but it is not always wise.
Why This DIY Project Is Worth It
This project checks a lot of boxes at once. It is budget-friendly, creative, customizable, and refreshingly different from store-bought wall art. It also gives you a chance to use materials you might already have at home, which makes it feel resourceful rather than random. That combination is a big reason upcycled decor continues to resonate with DIY lovers.
There is also something satisfying about turning an industrial leftover into something playful and expressive. Paint can lids are not precious, and that makes them easy to experiment with. You can go bold. You can repaint. You can try a color-blocked design, hate it, and start over without the emotional drama of ruining an expensive canvas.
And perhaps the biggest win of all: the finished decor can feel personal. Anyone can buy superhero-themed art online. But wall pieces built around your own color palette, your own symbols, your child’s initial, or your room’s exact layout feel more original. They look like they belong there, not like they were panic-ordered at midnight.
Experiences and Creative Inspiration From Making This Kind of Decor
The experience of making superhero wall decor using paint can lids is part of what makes the project so memorable. It does not feel like one of those overly serious DIY projects where you need twelve power tools, a level, a spreadsheet, and a backup plan in case your trim work betrays you. It feels playful right from the beginning. You start with something ordinary, maybe even a little ugly, and by the end you have a collection of bright, graphic wall pieces that actually change the mood of the room.
One of the most enjoyable parts is how fast the lids begin to look less like hardware and more like art. The transformation usually happens the moment the primer goes on. Suddenly the scuffed metal surface stops looking like garage leftovers and starts looking like a blank canvas. Then the color arrives, and that is when the project really wakes up. A deep blue background with a yellow bolt. A black outline around a red burst. A silver edge around a badge shape. Even before the pieces are hung, they start to feel like they belong in a comic-inspired space.
This kind of project is also fun because it invites experimentation without much pressure. If a design does not work, you can repaint it. If one lid turns out amazing and another one looks like it was designed during a sugar rush, you can keep the good one, redo the chaotic one, and continue on with your dignity mostly intact. That low-risk creativity is a big reason people enjoy upcycled decor so much. You are making something stylish, but you are also giving yourself permission to play.
There is often a personal side to the experience too. In family spaces, these lids can become collaborative art. One person might paint skyline backgrounds, another might add lettering, and a child might choose the color order or pick the symbols. That shared process gives the wall more meaning once it is finished. It is no longer just decor. It becomes a visual memory of time spent making something together, even if the table was covered in tape scraps and somebody absolutely got paint on their sleeve.
Another great experience with this project is seeing how much the final arrangement matters. A single painted lid is cute. A thoughtful group of them on the wall is what makes people stop and smile. Once they are arranged as a mini gallery, the room starts to feel more layered and intentional. A reading corner feels more imaginative. A playroom gets more energy. A bedroom gets a focal point that feels custom instead of generic. That is the magic of repeated shapes and strong color working together.
And then there is the satisfaction of telling people what they are made from. Guests assume wall decor is store-bought all the time. When they learn those graphic superhero pieces started as paint can lids, there is usually a moment of surprised respect. It is the best kind of DIY reaction: “Wait, those are what?” That little reveal makes the project even better. It proves that good decor does not always begin in the decor aisle. Sometimes it begins in the pile of things you almost threw away.
Conclusion
Superhero wall decor using paint can lids is one of those rare DIY ideas that is inexpensive, easy to customize, and genuinely stylish when done with a little planning. With proper prep, strong colors, simple graphic designs, and a smart wall arrangement, those humble metal lids can become comic-inspired decor that feels fresh, personal, and fun. Whether you are decorating a child’s room, a play space, or a creative corner of your home, this project proves that even the smallest household leftovers can have a heroic second act.