Table of Contents >> Show >> Hide
- Why Proper Mint Harvesting Matters
- When to Harvest Mint
- How to Harvest Mint Without Wrecking the Plant
- What to Do Right After Harvesting Mint
- How to Store Fresh Mint
- How to Dry Mint
- How to Tell When Mint Is Fully Dry
- How to Store Dried Mint
- Common Mistakes to Avoid
- Best Ways to Use Your Harvested Mint
- Common Gardener Experiences with Harvesting, Drying, and Storing Mint
- Conclusion
- SEO Tags
Mint is the overachiever of the herb garden. Give it a little sun, a little water, and about three minutes of freedom, and suddenly it is acting like it owns the backyard. The good news is that all that enthusiastic growth means you can harvest mint often, dry it for later, and store it without much fuss. The trick is knowing when to snip, how to dry it without turning it into sad brown confetti, and how to store both fresh and dried mint so the flavor sticks around.
If you grow peppermint, spearmint, chocolate mint, apple mint, or some mystery mint that smells amazing and refuses to behave, this guide will walk you through the whole process. You will learn when mint is at its best, how to harvest it without hurting the plant, several ways to dry mint leaves, and the smartest ways to store mint for tea, cooking, baking, cocktails, and more.
Why Proper Mint Harvesting Matters
Harvesting mint is not just about grabbing a handful of leaves and calling it a productive morning. The way you cut mint affects flavor, future growth, and how well the herb holds up in storage. When mint is harvested at the right time, the leaves tend to have better aroma and a cleaner, brighter taste. When it is cut correctly, the plant responds by branching out and producing even more leaves. In other words, proper harvesting turns a good mint plant into a tiny green factory.
Bad harvesting habits, on the other hand, can make the plant leggy, reduce air circulation, and leave you with a pile of leaves that lose quality quickly. So yes, even a low-drama herb like mint appreciates a little technique.
When to Harvest Mint
Harvest mint once the plant is established
Wait until your mint has put on healthy, sturdy growth before taking a big harvest. Small snips for cooking are fine as the plant matures, but a larger cut is best saved for a well-established plant with plenty of stems.
Pick mint before it flowers for the strongest flavor
One of the best times to harvest mint for drying is just before flowering or as flower buds begin to form. That is when the essential oils are usually strongest, which means better flavor in teas, desserts, sauces, and spice blends. Once mint blooms heavily, the flavor may become a little less concentrated and the stems can get tougher.
Choose the right time of day
For top-quality mint, harvest in the late morning or mid-morning after the dew has dried but before the hottest part of the day. This sweet spot helps you avoid excess surface moisture while still catching the leaves when their flavor is in great shape. Harvesting wet herbs is basically sending an engraved invitation to mold, and nobody wants that.
How to Harvest Mint Without Wrecking the Plant
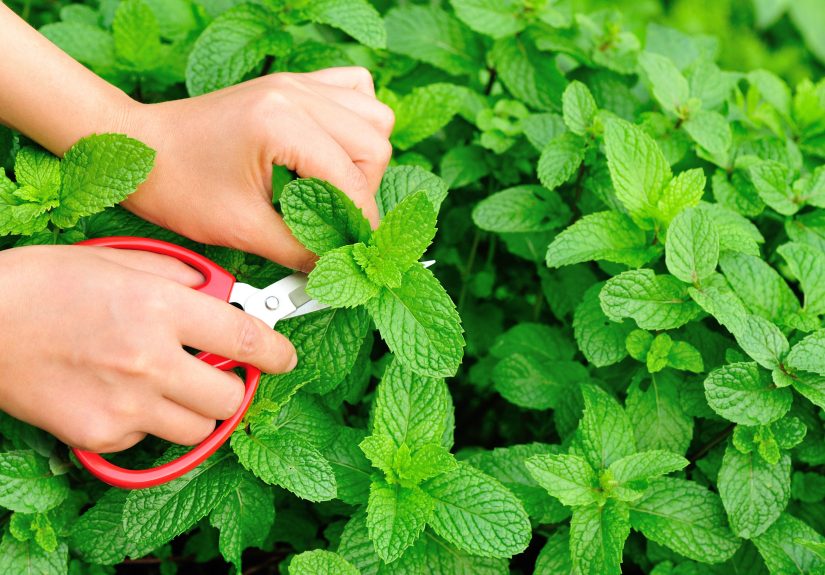
Use clean scissors or pruners
Do not yank leaves off by hand unless you enjoy uneven stems and a slightly offended plant. Use clean, sharp scissors or garden snips to make neat cuts. Clean tools help reduce plant stress and lower the chance of spreading disease.
Cut stems, not just random leaves
The best way to harvest mint is to cut entire stems rather than plucking leaves one by one. Snip just above a leaf pair or node so the plant can branch from that point. This encourages fuller, bushier growth and gives you longer stems that are easier to bundle for drying.
Do not overharvest at one time
Even fast-growing mint needs a chance to recover. A good rule is to avoid removing the whole plant in one swoop unless you are doing a major seasonal cut on a mature patch. For routine harvesting, take a moderate amount and leave enough leafy stems behind for regrowth. If you take a larger harvest, water the plant afterward and give it a little recovery time.
How low should you cut?
For small harvests, trim the upper portion of the stems and leave several inches of growth behind. For a larger harvest, cut back to just above a healthy set of leaves. The goal is simple: leave enough stem and leaf nodes so the plant can bounce back fast. Mint usually does, because mint has confidence.
What to Do Right After Harvesting Mint
Once you bring mint indoors, sort through it right away. Remove any yellow, bruised, or damaged leaves. If the mint is dusty or came from a garden that recently got splashed with soil, rinse it gently in cool water. Then pat it thoroughly dry or spin it dry in a salad spinner. Moisture is the enemy of successful drying and long storage, so this step matters more than people think.
If your mint is very clean, some gardeners skip washing until just before use. Either approach can work, but if you wash before drying or refrigerating, make sure the leaves are no longer wet on the surface.
How to Store Fresh Mint
Method 1: Refrigerate mint in a damp towel
This is one of the easiest ways to keep fresh mint happy for several days. Wrap the stems or leaves loosely in a slightly damp paper towel, then place the bundle in a partially open or lightly closed plastic bag in the refrigerator. Tuck it into the crisper drawer and check it every day or two. If the towel becomes soggy, replace it. You want moisture, not a swamp.
Method 2: Store mint like a bouquet
Mint also keeps well when the stems are placed in a glass or jar with a little water. Cover the leaves loosely with a plastic bag and store the container in the refrigerator. Change the water daily if you want the best results. This method is especially handy when you have whole stems and want them ready for tea, garnish, or that one homemade mocktail that makes you feel wildly accomplished.
How long does fresh mint last?
Fresh mint often keeps for about several days to a week, and sometimes a bit longer if the stems are fresh and storage conditions are right. The exact timing depends on how dry the leaves were when stored, how cold your refrigerator runs, and whether the mint was already a little tired from garden heat.
How to Dry Mint
Drying mint is one of the easiest ways to preserve a big harvest. The goal is to remove moisture fairly quickly while protecting the herb’s color and flavor. Good airflow, low humidity, and gentle heat are your best friends here.
Method 1: Air-dry mint
Air-drying is classic, simple, and perfect if you have a warm, dry, shaded place with good ventilation.
- Gather mint stems into small bundles.
- Tie them loosely with string, a twist tie, or a rubber band.
- Hang the bundles upside down in a dark or shaded, well-ventilated spot.
- If dust is a concern, place a paper bag loosely over the bundle and cut a few holes for airflow.
- Wait until the leaves are crisp and crumble easily.
This method can take several days to about two weeks depending on humidity. Small bundles dry better than fat bunches because air can actually reach the inner leaves. Big bundles may look rustic and charming, but they are also excellent at trapping moisture.
Method 2: Dry mint on screens or trays
If you prefer not to hang bundles, strip the leaves from the stems or lay whole sprigs in a single layer on a drying screen, rack, or tray. Keep them out of direct sun and turn them occasionally. This method works well for gardeners who have limited vertical space or who want a more even dry.
Method 3: Use a dehydrator
A dehydrator is one of the fastest and most reliable ways to dry mint, especially in humid climates. Spread mint leaves or sprigs in a single layer and dry at a low herb-friendly temperature, usually around 95 to 115 degrees Fahrenheit. In more humid conditions, a slightly higher setting may be needed. Check the mint often because herbs dry much faster than fruit. Depending on leaf size and moisture, mint may be ready in one to four hours.
Method 4: Oven-dry mint carefully
You can use an oven, but it is not always the first choice because higher heat can reduce flavor and dull the color. If you go this route, set the oven to the lowest possible temperature and keep a close eye on the leaves. Arrange them in a single layer and dry slowly. Some gardeners leave the oven door slightly cracked to help moisture escape. This method works in a pinch, but it is easier to overdo it and accidentally make mint-flavored disappointment.
Should you sun-dry mint?
Not really. Direct sun can fade color and reduce flavor, and high humidity can slow drying too much. Shade with airflow beats sun almost every time for herbs.
How to Tell When Mint Is Fully Dry
This is the part where patience pays off. Mint should feel crisp, not leathery. The leaves should crumble easily between your fingers, and small stems should snap rather than bend. If there is any softness left, the mint is not ready for storage. Putting partly dried mint into a sealed container is one of the fastest ways to get mold, and moldy mint is not an artisanal product. It is just a mistake.
How to Store Dried Mint
Choose the right container
Once the mint is completely dry, store it in an airtight container such as a glass jar with a tight lid, a metal tin, or a moisture-resistant container made for dried goods. Keep the leaves whole if possible and crush them only when you are ready to use them. Whole dried leaves usually hold flavor longer than pre-crushed mint.
Keep dried mint away from light, heat, and moisture
Store the container in a cool, dark, dry cupboard. Avoid keeping it above the stove, next to the dishwasher, or anywhere that gets steamy or warm. Heat and light can degrade flavor over time, and moisture can ruin the whole batch.
Label everything
Write the name of the herb and the date on the jar. This sounds obvious, but plenty of dried green herbs look suspiciously similar after a few months. Future you deserves better than playing “guess the leaf” while making tea.
How long does dried mint last?
Dried mint is usually best used within about six to twelve months for peak flavor, though safe storage time can vary with conditions. If the mint has lost most of its aroma, it is probably past its prime. Herbs tell on themselves this way. If the jar smells like almost nothing, the tea will probably taste like almost nothing too.
Common Mistakes to Avoid
- Harvesting when the plant is wet: Extra moisture makes drying slower and storage riskier.
- Taking too much at once: Mint is vigorous, but it still needs foliage left behind to regrow well.
- Making giant drying bundles: Thick bunches trap humidity and encourage mold.
- Using too much heat: High temperatures can strip mint of flavor and color.
- Storing mint before it is fully dry: If it bends, it is not done.
- Keeping dried mint near heat or sunlight: That is a shortcut to faded, weak flavor.
Best Ways to Use Your Harvested Mint
Once your mint is harvested and preserved, the fun part begins. Fresh mint is excellent in fruit salads, yogurt sauces, iced drinks, tabbouleh, pesto-style herb blends, and summer desserts. Dried mint works beautifully in tea, marinades, lamb dishes, grain salads, baked goods, and spice mixes. You can also blend dried mint with lemon balm or chamomile for homemade tea mixes that feel surprisingly fancy for something that started in a pot on the patio.
Common Gardener Experiences with Harvesting, Drying, and Storing Mint
Many home gardeners have the same funny experience with mint: they start with one cute little plant and end the season wondering whether they now run a mint farm. That fast growth is part of the charm, but it also teaches a useful lesson. The more regularly you harvest mint, the better it often behaves. Let it grow untouched for too long, and it can get tall, floppy, and a little chaotic. Trim it often, and it usually becomes fuller, softer, and much easier to manage.
Another common experience is discovering that fresh mint looks far more delicate after harvest than it did in the garden. A big basket of beautiful stems can wilt faster than expected if it sits on the counter too long. Gardeners often learn this the hard way after one distracted afternoon involving errands, laundry, and one episode too many of a favorite show. The lesson is simple: process mint soon after harvesting. Even getting it into water or the refrigerator quickly can make a huge difference.
Drying mint also tends to teach people that “more” is not always better. Beginners often make thick bundles because they look abundant and impressive. Then a few days later, the outer leaves are dry, the inside leaves are damp, and the whole bundle smells suspiciously like regret. Smaller bundles, better airflow, and a little patience usually solve that problem. It is one of those small gardening lessons that seems minor until you lose half a harvest.
Humidity is another teacher with strong opinions. In dry climates, air-drying mint can feel almost effortless. In humid weather, though, gardeners often realize why dehydrators have such loyal fans. A dehydrator turns a slightly stressful preservation project into a much more predictable one. People who try both methods often end up using air-drying in pleasant weather and switching to a dehydrator when the air feels like warm soup.
Storage has its own learning curve too. A lot of gardeners carefully dry mint, put it in a jar, and then make one tiny mistake: they store it right above the stove because it is convenient. A month later the mint smells weaker, the color looks duller, and the flavor is not nearly as lively. That experience usually creates a lifelong habit of using a cool cabinet instead. Convenience is nice, but flavor is nicer.
There is also the oddly satisfying experience of opening a jar of home-dried mint in winter. It is a small thing, but the smell can be surprisingly cheerful when the garden is asleep and everything outside looks tired. Many gardeners say this is the moment when preserving herbs finally clicks. You are not just saving leaves. You are saving part of the growing season for later.
And perhaps the most relatable mint experience of all is realizing that once you know how to harvest, dry, and store it properly, you stop treating mint like a garnish and start treating it like a staple. It becomes tea on a cold night, a quick upgrade for summer drinks, a bright note in savory meals, and a reason to feel just a little smug in the spice cabinet aisle. Fair enough. You earned it.
Conclusion
If you want the best flavor from mint, harvest it when the plant is healthy, cut stems cleanly, and aim for that sweet spot before flowering. Dry it with gentle airflow or low heat, make sure it is fully crisp before storing, and keep both fresh and dried mint away from excess moisture. The process is easy, but the little details matter. Get them right, and your mint will stay useful far beyond the growing season.
In other words, mint may be wildly enthusiastic in the garden, but with the right harvesting and storage habits, all that leafy energy becomes a very good thing. Your tea, desserts, sauces, and future self will thank you.