Table of Contents >> Show >> Hide
- The One Rule You Don’t Get to Improvise
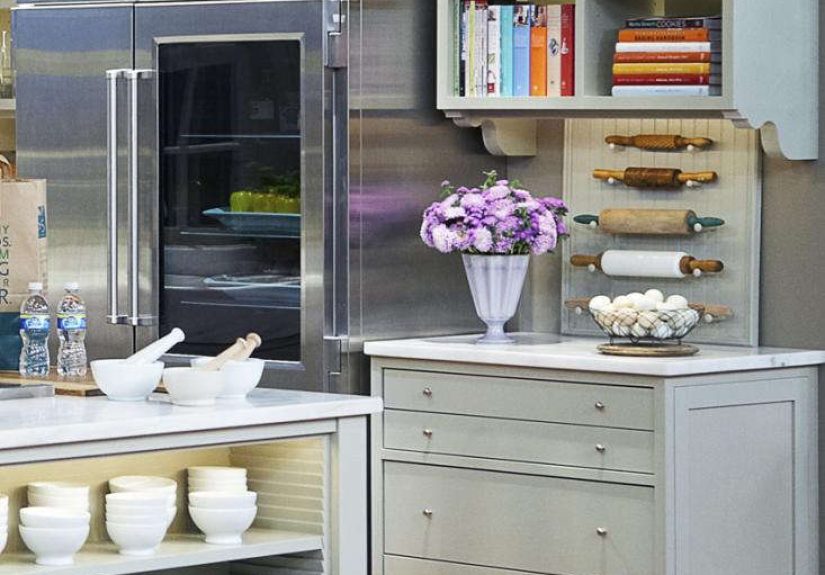
- What You’ll Need (A.K.A. Your Tomato Canning “Starter Pack”)
- The 5 Steps (Yes, ReallyJust 5)
- Troubleshooting: Normal Canning Weirdness (And When to Worry)
- Smart Upgrades (Once You’ve Mastered the Basics)
- Quick FAQ
- Extra: Real-World “Canning Experiences” That Make the Process Easier (About )
- Conclusion
Canning tomatoes is basically time travelexcept instead of a DeLorean, you’re using a stockpot, some glass jars,
and the unstoppable confidence of someone who just bought a jar lifter and now feels invincible.
Do it right and you’ll open a jar in January that tastes like July. Do it wrong and… let’s just say this is one
hobby where “close enough” is not a vibe.
The good news: the “right way” is wonderfully boring. It’s not secret family magic. It’s science-based steps,
tested processing times, and one crucial habit that separates safe, shelf-stable tomatoes from “please don’t.”
You can absolutely nail this in five stepsno canning cape required.
The One Rule You Don’t Get to Improvise
Tomatoes are acidic-ish, not always acidic-enough. Their acidity can vary by variety, ripeness, and growing
conditions, which is why modern home-canning guidance recommends adding acid (like bottled lemon
juice or citric acid) when canning most plain tomato products. That acid step helps keep the finished jar in a
safer range for shelf storage.
Translation: you can freestyle your pasta night. You can’t freestyle your jar chemistry. Follow a
research-tested recipe and processing time table (more on that below), and treat acidification like brushing your
teeth: not exciting, but you really want to keep doing it.
What You’ll Need (A.K.A. Your Tomato Canning “Starter Pack”)
- Fresh tomatoes (firm, ripe, unblemished)
- Mason-style canning jars (pints or quarts), plus new lids and rings
- Boiling-water canner (or a very large pot deep enough to cover jars with water) or a pressure canner
- Jar lifter (non-negotiable for your fingers’ happiness)
- Canning funnel, bubble remover (or a plastic utensil), clean towels, and a timer
- Bottled lemon juice or citric acid (this is the hero of the story)
- Optional: canning salt (for flavor, not safety), sugar (to soften the “tang”)
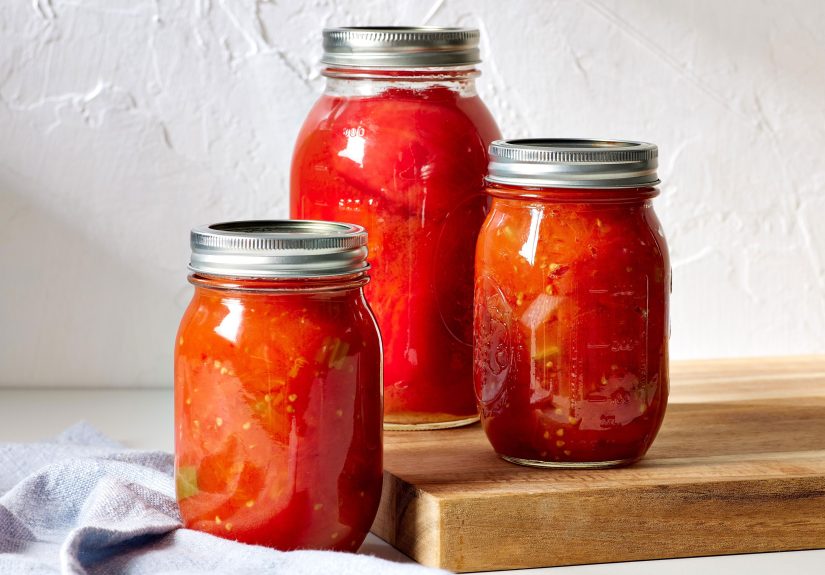
The 5 Steps (Yes, ReallyJust 5)
Step 1: Choose Your Tomato “Lane” and Set Up Your Canner
“Canning tomatoes” can mean a few different products, and the processing time depends on what you’re packing in
the jar. To keep this simple (and beginner-friendly), this article’s main example is
whole or halved tomatoes packed in waterit’s a classic, versatile pantry jar.
But you’ll also see quick examples for crushed tomatoes and sauce.
Here are common, research-tested options for plain tomatoes (times vary by altitude; always adjust):
| Tomato Product (Plain) | Method | Jar Size | Example Time at Low Altitude | Why You’d Pick It |
|---|---|---|---|---|
| Whole/Halved packed in water | Boiling-water bath | Pints / Quarts | 40 min (pints), 45 min (quarts) | Simple, flexible for soups, sauces, chili |
| Whole/Halved packed in tomato juice | Boiling-water bath | Pints / Quarts | 85 min (pints or quarts) | Richer tomato flavor, longer processing time |
| Whole/Halved raw packed without added liquid | Boiling-water bath | Pints / Quarts | 85 min (pints or quarts) | Dense pack, “just tomatoes” vibe, longer time |
| Crushed tomatoes (hot pack) | Boiling-water bath | Pints / Quarts | 35 min (pints), 45 min (quarts) | Great base for quick sauces, stews |
| Standard tomato sauce (hot pack) | Boiling-water bath | Pints / Quarts | 35 min (pints), 40 min (quarts) | Ready-to-go sauce base, smoother texture |
Set up your canner now. Place the rack in the bottom, add water, and start heating it so it’s
hot when your filled jars go in. For boiling-water canning, you want enough water to cover jars by about 1–2
inches once they’re submerged.
If you live at higher elevation, the water boils at a lower temperature, so you’ll adjust by processing longer
(boiling-water canning) or using higher pressure (pressure canning). If you’ve never checked your elevation,
now’s the timefuture you (and your tomatoes) will be grateful.
Step 2: Prep Your Tomatoes (Clean, Peel, Core)
Start with tomatoes you’d actually want to eat. If a tomato is bruised, moldy, or looks like it lost a wrestling
match with a squirrel, save it for compostnot canning.
Wash tomatoes well. Then peel them (peels can affect texture and quality).
The fastest peel method is the “hot-and-cold plunge”:
- Dip tomatoes in boiling water for about 30–60 seconds (until skins split).
- Move immediately to cold water.
- Slip off skins and remove the core.
Example (for water-packed jars): Leave tomatoes whole or cut them in halves. If you’re using big
slicing tomatoes, halving helps them pack more neatly. If you’re using paste tomatoes (like Roma),
whole-or-halved both workjust don’t crush them into jam trying to “make them fit.”
Quick planning tip: for a full canner load, you may need roughly a dozen pounds for pints or around twenty-ish
pounds for quarts, depending on jar count and tomato size. It’s normal to run out of tomatoes and do the
“one last jar” scramble. Consider it a rite of passage.
Step 3: Prep Jars and Lids (Hot Jars, Calm Energy)
Clean jars in hot soapy water (or a dishwasher cycle) and keep them warm so you’re not pouring hot food into cold
glass. Inspect for chips or crackstiny defects can turn into big heartbreak later.
Do you need to sterilize jars first? Only for products processed under 10 minutes. Most tomato
processes are far longer than that, so focus on clean and hot.
Prepare lids according to the lid manufacturer’s instructions. (Modern lids often don’t require boiling; many are
designed to be used with warm water and normal handling. The package is the boss here.)
Safety sidebar: skip “creative” methods like oven canning, open-kettle canning, or using appliances not intended
for pressure canning. If the method sounds like a hack, it probably is.
Step 4: Acidify, Pack, and De-Bubble (The Make-or-Break Step)
Before you add tomatoes, add acid directly to each jar:
- Bottled lemon juice: 1 tablespoon per pint, 2 tablespoons per quart
- Citric acid: 1/4 teaspoon per pint, 1/2 teaspoon per quart
- 5% vinegar: 2 tablespoons per pint, 4 tablespoons per quart (flavor is sharper)
You can add a little sugar to soften the tang if you want. And salt is optionaluse it for flavor, not safety.
Now pack (water-packed example):
- Place peeled tomatoes into the hot jar.
- Add boiling water to cover, keeping 1/2-inch headspace.
- Slide a bubble remover (or plastic utensil) around the inside to release trapped air.
- Re-check headspace and add more hot liquid if needed.
- Wipe the rim clean (sticky rims = seal problems).
- Apply lid and tighten the ring finger-tight (not Hulk-tight).
Why headspace matters: Too little and the jar may siphon liquid during processing. Too much and
you may not get a strong vacuum seal. Think of headspace as the jar’s “breathing room” while it goes through a
sauna.
Step 5: Process, Cool, Check Seals, and Store
Lower filled jars into your canner. For boiling-water canning, make sure jars are covered by water, bring the
water to a full rolling boil, and start timing only after it returns to a boil.
Maintain the boil for the entire processing time.
Water-packed whole/halved tomatoes (boiling-water canner, example times):
- 0–1,000 ft: 40 minutes (pints), 45 minutes (quarts)
- 1,001–3,000 ft: 45 minutes (pints), 50 minutes (quarts)
- 3,001–6,000 ft: 50 minutes (pints), 55 minutes (quarts)
- Above 6,000 ft: 55 minutes (pints), 60 minutes (quarts)
When time is up, turn off heat, remove the lid, and let jars rest a few minutes before lifting them out. Place
jars on a towel and cool undisturbed for 12–24 hours. Don’t retighten rings or press the lidslet the jars do
their thing.
After cooling:
- Check seals: the lid should be concave and not flex when pressed.
- Remove rings (yes, really), wipe jars, label with date and product.
- Store in a cool, dark place for best qualityuse within about a year for peak flavor.
If a jar didn’t seal, you have options: refrigerate and use soon, or reprocess within 24 hours using a
research-tested approach (typically reheat food, use a clean jar, and a new lid).
Troubleshooting: Normal Canning Weirdness (And When to Worry)
“My tomatoes are floating!”
Totally normal. Air in the fruit and differences in density can cause floating. De-bubbling well and using a hot
pack for some products can reduce it, but floating is usually a quality issue, not a safety issue.
“My jar lost liquid during processing.”
That’s called siphoning. Common causes: fluctuating boil, too-tight rings, not enough headspace, skipping the
post-process rest. If the jar sealed and you still have enough liquid for the food to be mostly covered, it’s
often okay. If food is exposed above liquid, prioritize using that jar sooner.
“The tomatoes separated into layers.”
Also normal, especially with raw pack. Hot pack methods and gentle stirring/heating steps (like crushed tomatoes)
can reduce separation.
“How do I know if something is spoiled?”
If a jar is unsealed, leaking, spurting when opened, smells “off,” or shows mold, don’t taste itdiscard safely.
When in doubt, throw it out. The goal is delicious pantry tomatoes, not a science experiment.
Smart Upgrades (Once You’ve Mastered the Basics)
- Crushed tomatoes: Great for pasta night shortcuts. Hot pack helps quality and consistency.
- Tomato sauce: Simmer to your preferred thickness, then can using a tested sauce process.
- Pressure canning: Often faster processing for some tomato products, but you still follow tested pressure/altitude guidance.
- Steam canning: Only for approved high-acid foods and only when the total processing time fits steam-canner guidance (many tomato products exceed limits).
Quick FAQ
Can I add basil, garlic, onions, or peppers to my jars?
Not unless you’re using a tested recipe designed for those ingredients (like a tested salsa).
Adding low-acid ingredients can change the safety of the final jar. Save the flavor add-ins for when you open the
jar, unless your recipe specifically includes them.
Can I use fresh lemon juice instead of bottled?
Bottled lemon juice is recommended because it has a standardized acidity. Fresh lemons can vary.
If you want consistent, repeatable results (and you do), bottled is the reliable pick.
Do I have to peel tomatoes?
For best quality, yes. Peels can affect texture and can trap air. The blanch-and-slip method is fast once you get
in a rhythmlike an assembly line, but tastier.
How long do home-canned tomatoes last?
Many sources recommend using home-canned foods within about a year for best quality. If stored properly and sealed,
they may last longer, but flavor and texture are best within that window.
Extra: Real-World “Canning Experiences” That Make the Process Easier (About )
Home canning has a funny way of turning reasonable adults into people who say sentences like, “I can’t talk right
now, I’m in my headspace era.” And honestly? Fair. The first thing many home canners learn is that tomato canning
is less about muscle and more about flow.
One common experience: underestimating how much time the “small steps” take. Peeling tomatoes sounds quick until
you realize you’ve adopted thirty tomatoes and each one needs a spa day (hot dip, cold dip, robe removal, core
extraction). The workaround is simpleset up stations. A pot of boiling water, a bowl of cold water, a compost
bowl, and a tray for peeled tomatoes. Suddenly you’re not “making a mess,” you’re “running a highly professional
tomato processing facility.” (Hairnet optional.)
Another very relatable moment: the first time you add bottled lemon juice to a jar and think, “Is this going to
taste like lemonade?” It won’t. The amount is small, and you can always add a pinch of sugar if the finished
tomatoes taste sharper than you like. Many people report that once those tomatoes are simmered into chili, sauce,
or soup, the “acid step” becomes invisiblelike a stagehand doing heroic work off-camera.
Then there’s the sound. Experienced canners will tell you the most satisfying noise in the kitchen is the
ping of a sealing lid. The second most satisfying sound is the silence after you stop trying to
make it happen. Jars need time. If you hover, you’ll be tempted to poke lids or tighten rings. Let them cool.
Walk away. Pretend you’re giving them privacy. A lot of seal failures come from impatience, not bad technique.
A practical experience tip that comes up again and again: keep everything hot. Hot jars, hot liquid, hot tomatoes
(when the recipe calls for it). Temperature shocks are where little problems startslower return to boil,
increased siphoning, and occasionally a cracked jar that will teach you new vocabulary. Warm your jars, keep the
canner water hot, and work in batches if you need to. It’s not a race. Your reward is a shelf of ruby-red jars
that look like you bought them at a fancy farm store.
Finally: write things down. The tomato variety, jar size, method, and date. Next year you’ll remember the
delicious batch… and forget whether you preferred water-pack or crushed tomatoes for weeknight sauces. A little
label now saves a lot of “future-you detective work.” And when you open that jar months later and it tastes like
summer, you’ll feel like you pulled off the world’s most wholesome heist.
Conclusion
If you remember only three things, make them these: use a tested process,
acidify your jars, and process for the full time adjusted for your altitude.
From there, canning tomatoes is just repeating the same calm steps until your pantry looks like a tomato
renaissance painting. Five steps. One summer afternoon. Winter you is going to be thrilled.